
Git-Dateien verloren? Gelöschte und noch nicht festgeschriebene Dateien wiederherstellen

A branch switch leaves your source folder looking empty. A hard reset removes this morning’s edits. Or a cleanup command deletes a script you never committed. These git lost files situations look similar, but the right recovery method depends on whether Git ever stored the missing content.
Missing from your working folder does not necessarily mean gone from the repository. A commit, the staging area, another branch, or a stash may still contain a usable copy. Start with those locations before you scan a disk.
This guide follows that order. If Git has no copy and the actual file has disappeared from storage, the Anleitung zur Wiederherstellung gelöschter Dateien covers the next branch. For that specific Windows scenario, Magic Data Recovery offers a storage-level recovery option; it does not reconstruct Git history.
Inhaltsübersicht
Git Lost Files: Choose the Right Recovery Method
The quickest answer: restore a tracked file from the index or a known commit. Check reflog for lost commits and local history for edits Git never saved. Use disk recovery only when no usable copy remains.
Was ist passiert? | Where a copy may exist | Start here |
You deleted a tracked file without staging the deletion | Git’s index | Restore the individual path |
You staged the deletion or used | The last commit | Restore that path from |
You committed the deletion | An earlier commit | Find a revision that contains the file |
A reset, rebase, or amend hid a commit | Local reflog | Create a recovery branch at the old commit |
You staged content but never committed it | Index or surviving blob objects | Check the index, then inspect objects |
You never added, committed, or stashed the content | Editor history, backups, original disk | Check copies before disk recovery |
Files vanished after switching branches | Another branch or checkout configuration | Confirm location and branch first |
This distinction matters for Git recover uncommitted files searches: “uncommitted” includes both staged content and changes Git has never stored. Those two cases have different recovery limits.
Protect the Repository Before Trying Commands
Pause builds, dependency installs, and automated cleanup. If the drive works normally, copy the repository to another physical drive, including hidden Git metadata. A normal clone does not preserve all local recovery clues, such as your index, reflog, and unreachable objects.
For linked worktrees or submodules, .git may be a pointer file rather than a directory. Preserve the Git directory it references too. If you suspect physical drive failure, stop ordinary copying and scanning and seek professional recovery help.
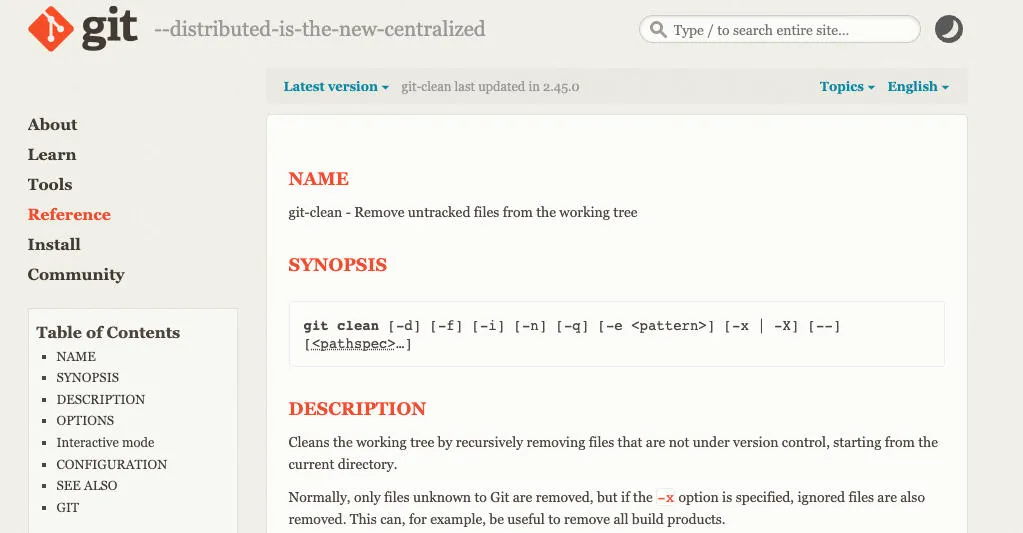
Avoid these commands during recovery:
git reset --hard, which discards tracked working changes and can remove obstructing untracked paths.git clean -fdodergit clean -fdx, which removes untracked content;-xalso includes ignored files.git gc --prune=nowundgit prune, which can remove objects you still need.
Git’s reset documentation und clean documentation explain these effects. A whole-repository rollback is usually unnecessary when you only need one missing file.
Use the examples below from the repository root. Replace sample filenames and hashes with your own. The restore commands require Git 2.23 or later and work in Git Bash on Windows, as well as macOS and Linux terminals.
Check Whether the File Is Missing or Simply Elsewhere
Bevor Sie versuchen Git file recovery, confirm which repository and branch you opened:
- git rev-parse –show-toplevel
git status --shortgit branch --show-currentgit branch --all
Next, search Explorer or Finder using the exact filename, extension, and approximate modification time. Check another checkout, a renamed project folder, external storage, and your editor’s excluded folders.
Three Git concepts explain most git lost files cases:
- Working tree: the files you currently edit.
- Index: the content you selected with
git addfor the next commit. - Commit: a saved project snapshot in Git history.
Git does not automatically save every edit. Staging captures the content at that moment, so later edits may exist only in your working tree. See Git’s guide to recording changes.
Recover Deleted Files in Git Before Committing
Geeignet für: a tracked file that you deleted locally while the repository still contains its content.
First, inspect the path:
git status --short -- src/app.jsgit diff -- src/app.jsgit diff --cached -- src/app.js
In short status, the first column describes index changes; the second describes working-tree changes. D means an unstaged deletion. D means a staged deletion.
Restore an Unstaged Deletion from the Index
An recover deleted files in Git when the index still contains the file:
git restore -- src/app.js
This restores the staged version, which may differ from the last commit. For example, if you staged an updated function before deleting the file, Git can bring back that staged content. It cannot also recover later unstaged edits through this command.
Restore a Staged Deletion from HEAD
If you staged the deletion, the index no longer holds the file at that path. After preserving any useful copy, restore its last committed version:
git restore --source=HEAD --staged --worktree -- src/app.js
This changes both the index and the working file for that path. It does not bring back a newer, uncommitted version. Git’s restore documentation explains the source and destination options.
For a newly added file in a repository with no commits, KOPF does not yet exist. If the index still contains the file, use the index-based method instead.
Restore a File from an Earlier Commit or Another Branch
Geeignet für: a committed deletion, an older file version, or a file missing only from your current branch.
Start with its history:
git log --all --oneline -- src/app.js
If you cannot remember its old path, list deletion records:
git log --all --diff-filter=D --summary
Inspect a candidate commit before restoring anything:
- git show abc1234:src/app.js
Ersetzen Sie abc1234 with a commit that actually contains the file. Then restore only that path:
git restore --source=abc1234 -- src/app.js
Wenn abc1234 is the deletion commit, inspect its parent with git show abc1234^:src/app.js. For a simple deletion, the parent may hold the desired version. Merge commits have multiple parents, so verify the content instead of assuming the first parent is correct.
Für Git missing files after switching branches, inspect the branch that contains the file:
- git show feature/login:src/app.js
git restore --source=feature/login -- src/app.js
These examples preserve your current branch and other files. Check the Git log documentation for history searches and the Git show documentation for inspecting stored content. History searches may need the old filename if someone renamed the file.
Use Reflog for Git Lost Changes After a Reset
Geeignet für: committed work that disappeared from visible history after a reset, rebase, amend, or branch movement.
Für git reset hard recovery, inspect your local reference history:
- git reflog –date=local
Look for the commit before the unwanted operation. Confirm its content, then preserve it under a new branch name:
- git show –stat abc1234
git branch recovery-lost-work abc1234
Creating the branch does not switch your working tree. You can inspect or restore individual files from it afterward.
Reflog does not record every file edit. It records reference movements. If the missing content never entered a commit, reflog alone cannot recover it. Entries and objects also have limited retention. Git explains the mechanism in its reflog documentation.
Für git lost files after deleting a branch, the official Git data recovery guide describes rescuing surviving commits. Preserve a useful commit promptly once you identify it.
Check Stashes and Staged but Uncommitted Content
Recover Files from a Stash
Vor der Übernahme von Git lost changes permanently, check whether you put them aside:
- git stash list
- git stash show –include-untracked –name-only ‘stash@{0}’
- git stash show -p –include-untracked ‘stash@{0}’
Choose the stash by its contents, not just its date. In a protected copy with a clean working tree, apply the correct entry:
- git stash apply ‘stash@{0}’
Anders als pop, apply keeps the entry in the stash list. It can produce conflicts, so review the result before continuing.
A default stash does not include untracked files. Those require -u when creating the stash; ignored files require -a. Consult the Git stash documentation.
Recover Staged Content from Surviving Objects
Für Git recover uncommitted files cases where you previously ran git add, check whether the index still holds the content:
- git ls-files –stage — src/app.js
- git show :src/app.js
The second command displays the indexed version. The Git ls-files documentation describes how to inspect index entries.
If a reset replaced the index, a blob containing the staged content may still survive. Work on your preserved repository copy:
- git fsck –full –no-reflogs –unreachable
For an unreachable blob candidate, inspect its content:
- git cat-file -p BLOB_HASH
Ersetzen Sie BLOB_HASH with an actual object ID. Look for a distinctive function, comment, or configuration value. Blobs contain content, not the original filename, so identification can take time.
For dangling objects, git fsck --lost-found writes recovery material under .git/lost-found/. It does not promise to export every unreachable object or recreate a complete directory tree. See Git fsck und Git cat-file.
Export a confirmed blob to a new file on another drive using Git Bash output redirection or a byte-preserving export method. Avoid copying binary content from terminal output. This route helps with Git staged files recovery, but only while the relevant objects remain intact.
Recover Untracked Files Through Editor History and Backups
Geeignet für: deleted files or newer edits that Git never added, committed, or stashed.
An recover untracked files, check your editor before scanning storage. In VS Code, open the Command Palette and run:
- Lokale Geschichte: Eintrag zum Wiederherstellen suchen
Select the missing file, inspect available entries, and compare their content. For an existing file, the Timeline view can also show local history. Availability depends on saved entries, settings, and retention; it is not a guaranteed record of unsaved typing. Microsoft documents this in the VS Code user interface guide.
Next, inspect the Recycle Bin or Trash, cloud deleted items, cloud version history, and system backups. Terminal deletion commands may bypass the Recycle Bin. Check your original storage path rather than assuming every file in the project lived inside the repository.
A remote repository can restore pushed commits, but it does not automatically contain local untracked files, unsaved edits, or private stashes. Ask teammates about separate copies if the missing work was shared elsewhere.
Für git clean recovery, these external copies are especially important: Git cannot recover content it never stored merely because the deletion happened inside a repository.
When Git Lost Files Require Disk Recovery
Move to storage recovery only after answering these questions:
- Does the correct branch, index, commit, stash, or surviving object contain the needed version?
- Can your editor, cloud history, or backup supply it?
- Is the actual file missing from its original storage location?
- Does the device remain stable and detectable?
If no usable copy exists and the file has truly disappeared, git lost files becomes a disk-level problem. Examples include an untracked script removed by cleanup, a deleted project directory, or a formatted drive containing local work.
Recover Deleted Project Files with Magic Data Recovery
Magic Data Recovery supports Windows recovery scenarios involving deletion, formatting, and file-system errors. Its scanning and filtering workflow offers a practical way to inspect recoverable project files when Git has no stored copy.
Unterstützt Windows 7/8/10/11 und Windows Server
The relevant advantage is scope: Git searches its own records, while this tool scans the original storage. For a deleted local script or project archive, that makes it a more appropriate next step than repeatedly running Git commands. The visual scan-and-review workflow also lets you check candidates before returning them to the project.
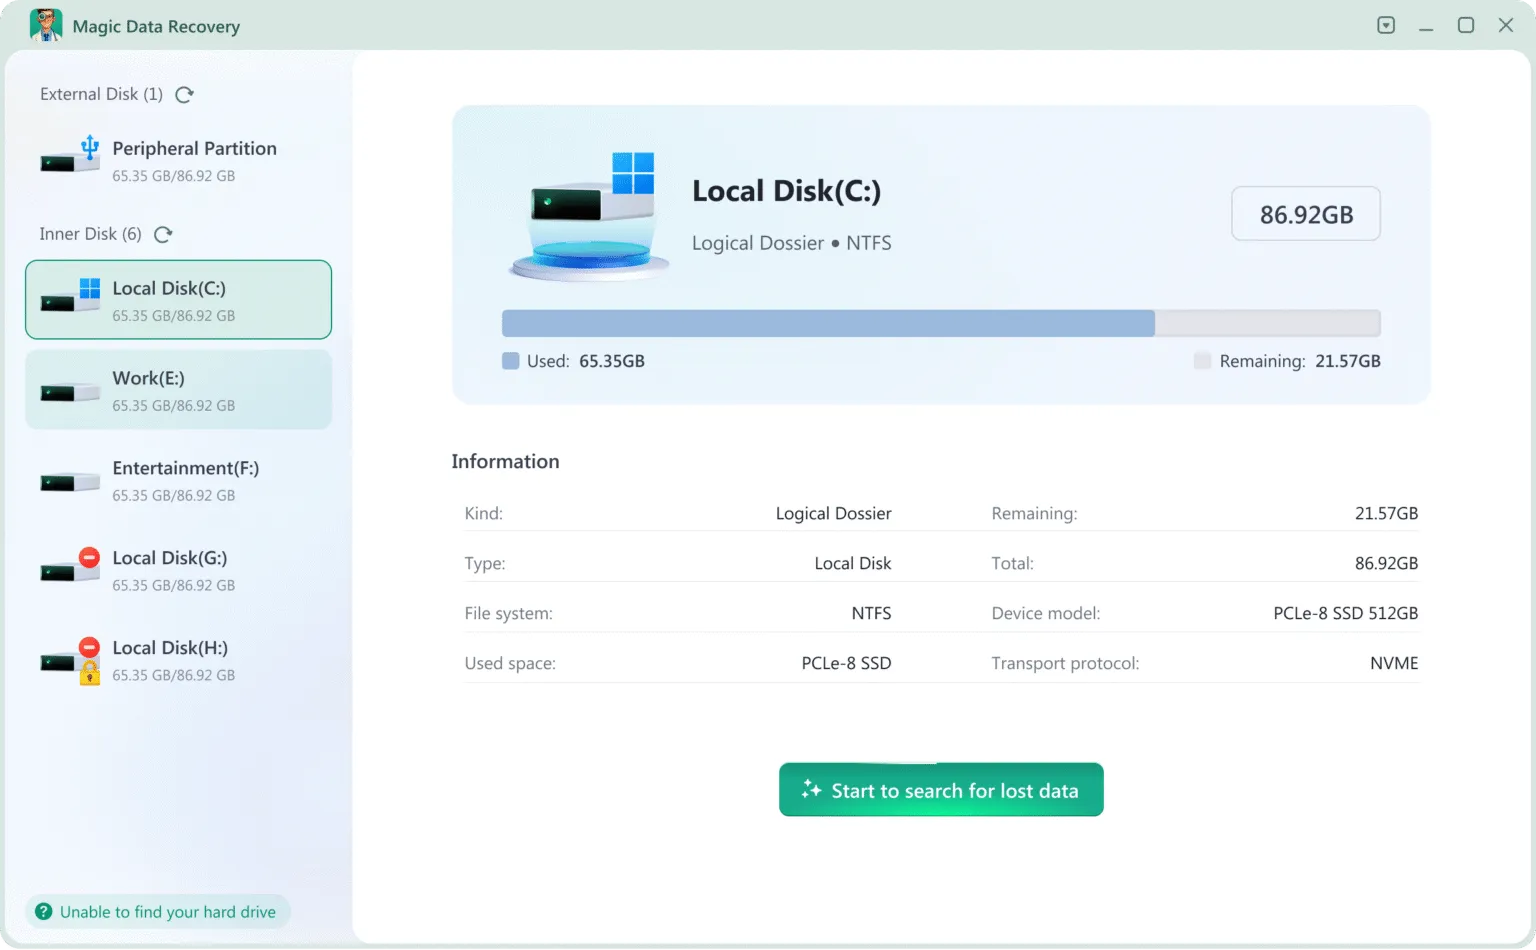
Follow four steps:
- Set up safely. Install and run the tool from another drive or computer where practical. Minimize writes to the affected device.
- Scan the original volume. Select the drive that held the missing files, even if your current checkout sits elsewhere.
- Review candidates. Use available filename, path, and type filters. Preview supported formats; validate source files in an editor after export.
- Erhole dich woanders. Save selected files to a different physical drive and keep the original repository untouched until verification.
Recovery may return older versions, incomplete files, or changed names. The tool cannot invent unsaved code, rebuild missing commit relationships, or restore dependencies automatically. Its suitability here comes from addressing actual storage loss after native recovery options fail.
Validate Recovered Files Before Rejoining the Project
Für Git lost files recovery, success means usable content, not just a filename in a scan result.
Open recovered source files in a separate folder. Check important functions, encoding, line endings, and whether the latest changes actually exist. File size and timestamps offer clues, but they do not prove you found the correct version.
Compare the candidate with the current project. Copy only verified files into a protected working checkout, review git diff, and run the relevant build or tests. Confirm configuration files and external assets separately.
Finally, commit the restored changes on a recovery branch. Avoid replacing an entire .git directory with partially recovered metadata; recover source content separately if repository integrity remains uncertain.
If Recovery Fails, Check the Limitation
A deeper scan cannot recreate overwritten content. SSD TRIM and subsequent device cleanup can also make deleted data unavailable. Microsoft’s Windows File Recovery guidance recommends reducing drive use and saving recovered data to a separate drive.
If the device disconnects repeatedly, makes unusual noises, or produces read errors, stop repeated scans. For a stable device, recheck the original volume and any external backups before trying further software.
Einige Git missing files need a different explanation. Sparse checkout intentionally leaves some tracked paths out of the working tree, while submodules maintain separate repository content. Inspect those configurations before treating an empty folder as deletion. Git documents sparse checkout und submodule initialization.
Prevent Git Lost Files in Future Work
Commit useful milestones and push important branches to a remote. Before cleaning a workspace, preview the affected paths with git clean -nd; if you intend to include ignored files, inspect git clean -ndx too.
Keep editor local history enabled and back up the full project folder. Include untracked resources and external assets that a Git remote cannot replace. Review .gitignore deliberately: ignoring a valuable file does not create a backup of it.
Before a reset or rebase, preserve ongoing work and check what your backup or stash actually includes. A short verification now can save hours of reconstruction later.
Conclusion: Match Git Lost Files to the Copy That Still Exists
Das Beste git lost files solution depends on where the missing version survives. Use the index or a commit for tracked files, reflog for lost commits, and editor history or backups for content Git never stored.
If those checks confirm actual storage loss, Magic Data Recovery is a reasonable Windows option because it addresses deletion, formatting, and file-system errors beyond Git’s records. Follow the Anleitung zur Wiederherstellung gelöschter Dateien, save candidates elsewhere, and verify the code before returning it to your project.
Unterstützt Windows 7/8/10/11 und Windows Server
FAQs
1. Kann Git Dateien wiederherstellen, die nie festgeschrieben wurden?
git add oder in einem Versteck gespeichert. Falls Git die fehlende Version nie gespeichert hat, überprüfen Sie den lokalen Verlauf Ihres Editors, Sicherungskopien und Cloud-Kopien. Eine Festplattenwiederherstellung kann nach einer tatsächlichen Löschung helfen, kann jedoch keinen Code rekonstruieren, der nur im Arbeitsspeicher vorhanden war.2. Wie kann ich eine gelöschte Datei wiederherstellen, ohne alles zurückzusetzen?
git restore -- Pfad/zur/Datei. Falls Sie die Löschung vorläufig zurückgestellt haben, stellen Sie den Pfad wieder her aus KOPF mit --staged --worktree. Bei einer endgültigen Löschung sollten Sie eine frühere Version ausfindig machen, die die Datei enthält, und nur diesen Pfad wiederherstellen. Behalten Sie neuere Inhalte bei, bevor Sie etwas ersetzen.3. Stellt „git reflog“ noch nicht festgeschriebene Änderungen wieder her?
4. Kann ich Dateien nach dem Befehl „git clean -fd“ wiederherstellen?
5. Warum zeigt „git pull“ die Meldung „auf dem neuesten Stand“ an, obwohl Dateien fehlen?
git status und stellen Sie die nachverfolgten Löschungen aus der entsprechenden Quelle wieder her. Überprüfen Sie außerdem Ihren aktuellen Zweig, die Einstellungen für „sparse-checkout“ und ob der fehlende Ordner zu einem Submodul gehört.6. Wo speichert Git „lost-found“-Dateien?
git fsck --lost-found schreibt „dangling“ Recovery-Objekte unter .git/lost-found/commit/ oder .git/lost-found/other/. Blob-Einträge enthalten Dateiinhalte, weisen jedoch in der Regel keine ursprünglichen Dateinamen auf. Suchen Sie in verknüpften Arbeitsverzeichnissen zunächst das eigentliche Git-Metadatenverzeichnis, bevor Sie nach diesen Ordnern suchen.7. Kann Magic Data Recovery das gesamte Git-Repository wiederherstellen?
8. Werden meine letzten Änderungen wiederhergestellt, wenn ich eine ältere Git-Version wiederherstelle?

Jason ist ein Spezialist für Datenwiederherstellung und technischen Support mit über 15 Jahren praktischer Erfahrung. Er hat intensiv mit Endnutzern zusammengearbeitet, schwierige Fälle von Datenverlust behoben und praktische Lösungen für versehentlich gelöschte Daten, formatierte Laufwerke, beschädigte Dateisysteme, verlorene Partitionen, Systemausfälle und andere Notfälle im Bereich der Datenwiederherstellung bereitgestellt. Zu seinen Fachgebieten gehören außerdem Datensicherung und -wiederherstellung, Dateireparatur sowie Notfallwiederherstellung, wobei er besonderen Wert auf eine sichere, zuverlässige und technisch korrekte Beratung legt.