
GNU ddrescue: Como recuperar dados de um disco com falha

A Windows file transfer stops with an I/O error, or Ubuntu can see your hard drive but cannot read certain folders. GNU ddrescue can help preserve the readable sectors before the situation gets worse. However, an inaccessible drive is not necessarily a deleted drive, and a completed disk image is not the same as restored files. This guide shows you how to diagnose the problem, copy data safely, resume an interrupted rescue, and access the resulting files. For broader hardware symptoms, consult Amagicsoft’s guia de recuperação de disco rígido.
Resposta rápida: GNU ddrescue is a free command-line utility that copies readable blocks from a damaged or unstable storage device into a disk image or another disk. It tracks progress with a mapfile and can retry unreadable areas. It does não repair physical damage, undelete individual files, or guarantee complete recovery.
Índice
Before Using GNU ddrescue: Diagnose the Drive
The first decision is whether you have a copying problem, a missing-file problem, or a hardware failure. These require different actions.
O que você observa | Situação provável | A primeira medida mais segura |
Drive opens, and files copy normally | Healthy readable storage | Copy essential files to a healthy destination; no ddrescue needed |
File copies freeze or report I/O/CRC errors | Unreadable sectors or unstable connection | Check a known-good cable once; consider imaging if the drive remains stable |
Windows reports RAW, but hardware remains stable | Danos no sistema de arquivos ou na partição | Preserve the disk state; examine a copy before repair |
Only a few files were deleted, and the drive is healthy | Logical deletion | Check Recycle Bin and backups before considering file recovery |
Drive clicks, grinds, repeatedly disconnects, or shows the wrong capacity | Possible physical or firmware failure | Stop DIY scans; seek a professional recovery service |
For more help identifying detection problems, see how to recover data from an unrecognized hard drive. In particular, a drive that no longer appears reliably in BIOS or Linux is not a good candidate for repeated software retries.
Protect the Original Before Doing Anything Else
- Stop saving, installing, or downloading files to the affected drive.
- Do not format, initialize, defragment, or run CHKDSK against a disk showing read errors.
- Avoid mounting the failing source read-write; ideally, unmount it completely.
- Prepare a healthy destination with enough space for the entire source capacity, plus a separate location for the mapfile.
- If the data is irreplaceable and the disk is mechanically unstable, stop rather than running an extended rescue.
Safety rule: Rescue first, inspect the copy second, and repair only after you have verified important files. The official GNU ddrescue manual likewise warns against repairing a file system on a drive with I/O errors.
What GNU ddrescue Actually Recovers
GNU ddrescue operates at the sector level. It tries readable areas first, records troublesome areas, and later revisits them when appropriate. It does not need Windows to recognize an NTFS, FAT32, or exFAT volume to copy its underlying sectors.
Three terms determine the workflow:
- Fonte: The damaged drive or partition that ddrescue reads.
- Destination: A healthy disk image file or physical disk receiving the copy.
- Mapfile: A small progress record showing rescued, pending, and bad areas. Keep it on reliable storage and reuse it only with the same rescue.
For example, an image may contain most of a damaged 500 GB disk while still missing a few sectors. That can preserve many documents, but an unreadable sector inside a particular document may leave that document corrupted. Furthermore, deleted data already removed by SSD TRIM will not reappear simply because you copied the disk.
GNU ddrescue vs. File Recovery Software
Tarefa | GNU ddrescue | Software de recuperação de arquivos |
Copy readable sectors from an error-prone drive | Primary purpose | Not necessarily designed for it |
Resume sector copying after interruption | Yes, with a mapfile | Varia |
Recover individually deleted files | Não | Often, if data remains recoverable |
Interpret damaged file-system metadata | Does not reconstruct files | May locate recoverable files |
Repair failing hardware | Não | Não |
Therefore, do not use a file recovery scan as a substitute for carefully preserving a failing physical drive. Equally, you do not need ddrescue solely because an otherwise healthy disk lost a few files.
How to Install GNU ddrescue on Ubuntu
On Ubuntu, Debian, or Linux Mint, open Terminal and install the gddrescue package:
sudo apt update
sudo apt install gddrescue
Then confirm that the executable is available:
ddrescue --version
Version note: GNU ddrescue 1.30 was released in January 2026. The version offered by your Linux distribution may differ. In particular, -n significa --no-scrape, while in version 1.30 -N significa --sem varredura (older documentation used -N differently). Check ddrescue --help before adapting commands from older tutorials.
How to Use GNU ddrescue to Create a Disk Image
The commands below are illustrative. They assume /dev/sdb is the failing drive and /mnt/recovery is a directory on a separate, healthy, mounted destination disk. Never paste device names without checking your computer.
Step 1: Identify Source and Destination
Executar:
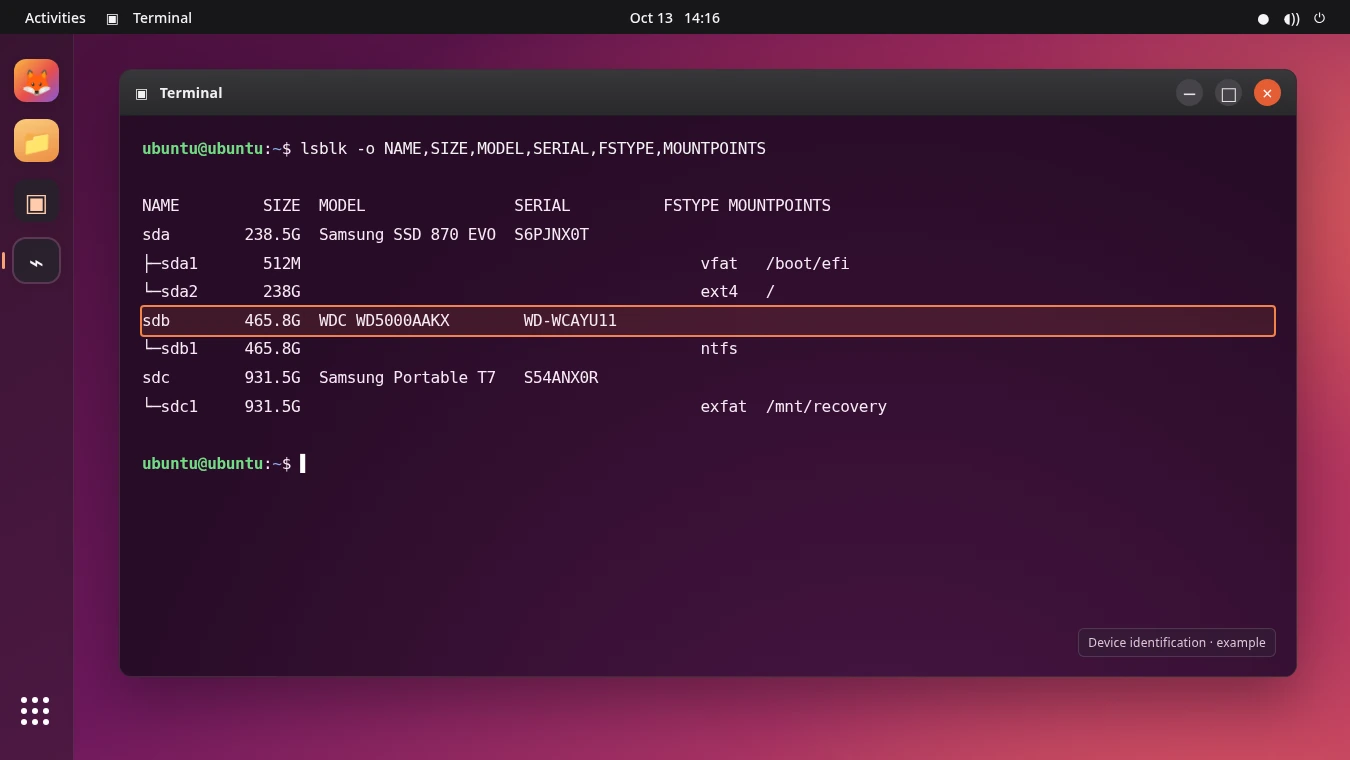
lsblk -o NAME,SIZE,MODEL,SERIAL,FSTYPE,MOUNTPOINTS
Compare the drive sizes, models, and serial numbers. A reboot or reconnection can change names such as /dev/sdb e /dev/sdc. Next, unmount the failing drive’s partitions. Make sure the destination has free space at least equal to the source’s logical size and supports large image files.
Step 2: Make an Initial Rescue Image
After confirming the mounted destination directory, run:
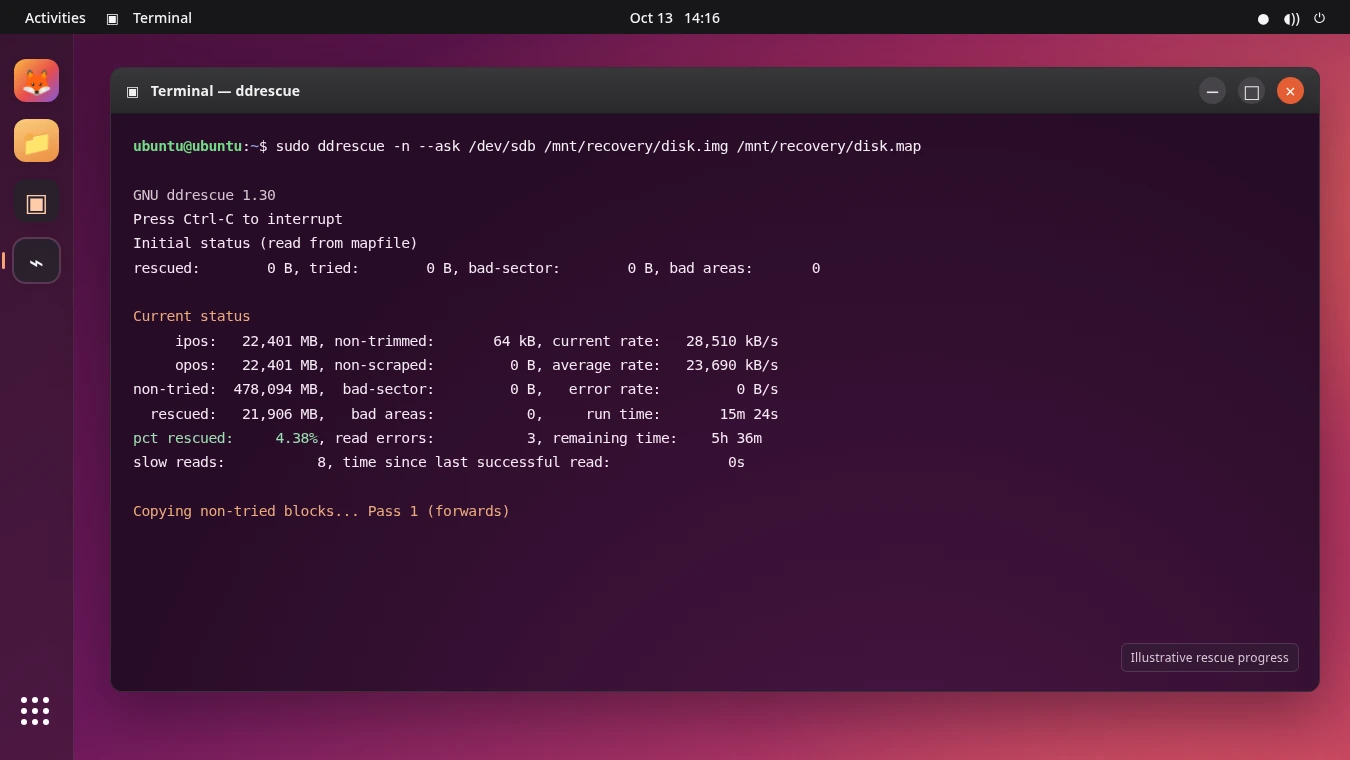
sudo ddrescue -n --ask /dev/sdb /mnt/recovery/disk.img /mnt/recovery/disk.map
Aqui, -n skips the scraping phase, --ask requests confirmation, disk.img stores the copied sectors, and disk.map preserves progress. This initial run favors quicker data collection over laborious scraping. It may still perform other recovery phases; -n faz não mean “copy good sectors only.”
Never save the image or mapfile to the failing source disk. If the destination is another physical disk instead of an image file, the command needs different precautions because that entire output device will be overwritten.
Step 3: Check Progress Before Retrying
Enquanto GNU ddrescue runs, pay attention to rescued, pct rescued, non-tried, bad-sector, e erros de leitura. A high rescued percentage is useful, but it is não a percentage of complete documents. Also, repeated disconnects or worsening mechanical symptoms are reasons to stop, not to increase the retry count.
Step 4: Retry Remaining Difficult Areas Only If Stable
If the device remains consistently detectable, you may try a limited additional pass using the same image and mapfile:
sudo ddrescue -d -r2 --ask /dev/sdb /mnt/recovery/disk.img /mnt/recovery/disk.map
-d requests direct input-disk access where supported, and -r2 allows two retry passes over unreadable areas. Direct access may require adjusted sector settings on some devices. Avoid unlimited retries, especially on a worsening drive.
Step 5: Resume After an Interruption
If the computer shuts down or you pause the operation, reconnect everything, verify device identities again, and rerun the original command with the same output and mapfile:
sudo ddrescue -n --ask /dev/sdb /mnt/recovery/disk.img /mnt/recovery/disk.map
The mapfile tells ddrescue which areas it has already copied. Do not delete it, create a new unrelated mapfile, or accidentally switch the source to a different drive.
Can You Run GNU ddrescue on Windows 11?
For physical disk rescue, a Linux live USB is typically more practical than attempting to access Windows drives through an unfamiliar compatibility layer.
- On a healthy computer, prepare a bootable Ubuntu USB.
- Boot the affected computer into Ubuntu’s Try Ubuntu live environment.
- Connect a separate healthy destination, then install
gddrescuese necessário. - Identify the disks with
lsblkand follow the imaging steps above.
Cygwin and some graphical frontends offer other routes, but permissions and raw-device access differ. Also, WSL does not automatically expose every physical Windows disk as /dev/sdX. A tool running inside Windows is not necessarily a direct replacement for a Linux rescue environment.
After Imaging: Check Whether Your Files Are Actually Recoverable
This is the step many tutorials omit. GNU ddrescue finishes copying sectors, but you still need to determine whether the original folders and files survived.
Case 1: Files Open Normally on the Copy
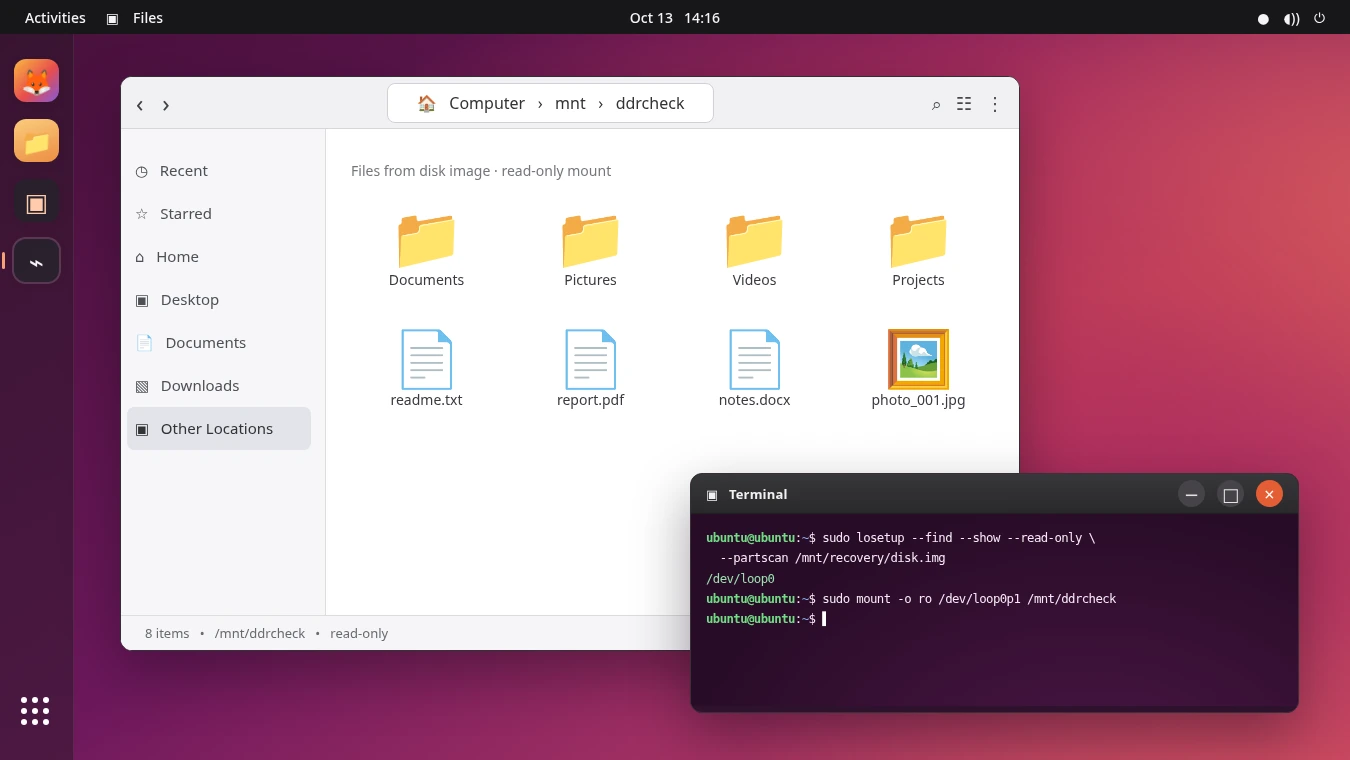
Inspect the image or clone somente leitura first. On Linux, an experienced user can attach a raw image as a read-only loop device and inspect its partitions. Do not run repair commands on your only image. If files open correctly, copy the valuable ones to a separate healthy destination and verify their contents, not just their filenames.
Case 2: A Partition Appears RAW or Cannot Mount
The copied sectors may be readable even when file-system metadata is damaged. Preserve the master image, investigate on a working copy, and do not accept a Windows prompt to format or initialize the rescued disk. Our RAW drive recovery guide explains why formatting before extracting files can reduce recovery options.
Case 3: Some Files Were Deleted Before the Image Was Made
An image records available sectors; it does not reverse deletion. First check Recycle Bin, File History, and existing cloud or offline backups. If there is no usable copy and the deleted data has not been overwritten or removed by TRIM, file recovery software may help analyze a healthy Windows-recognized clone.
Case 4: The Copy Has Unreadable or Corrupted Files
Compare the original file names, sizes, dates, and important contents. One missing sector may affect part of a document or its file-system record. Consequently, “100% rescued” is not a guarantee of logical integrity, and an incomplete rescue cannot reconstruct data that was never read.
When Is File Recovery Software the Right Next Step?
Use this checkpoint before scanning anything:
Verificar | Se sim | If no |
Are the files visible and opening on the clone? | Copy and verify them | Continue checking |
Does Recycle Bin, version history, or a backup contain the missing files? | Restore that copy | Continue checking |
Is the original device physically unstable? | Pare de tentar fazer isso sozinho | Examine only the healthy clone |
Does Windows reliably recognize the cloned disk? | Consider logical file recovery | Do not assume Windows recovery software can scan it |
Only when the file itself is missing or inaccessible and built-in recovery cannot help should you consider a dedicated file scanner. This is a different job from disk-sector rescue.
Recupere arquivos perdidos com o Magic Data Recovery
Se GNU ddrescue produced a healthy physical clone that Windows recognizes, but folders or deleted files remain inaccessible, Magic Data Recovery may help locate recoverable documents, photos, videos, and other files on that clone.
Unlike ddrescue’s mapfile-based copying, it scans supported Windows-accessible storage for lost files. It does not repair physical damage, restore overwritten sectors, or guarantee that a file containing unreadable blocks will open. Support for directly scanning a ddrescue .img image should não be assumed; use this workflow only when the rescued data resides on a recognized disk or partition.
Como usar o Magic Data Recovery
Etapa 1: Faça o download e instale o Magic Data Recovery
Install the software on a healthy Windows volume, not on the cloned partition containing lost data. Keep the original failing disk disconnected if possible.
Compatível com Windows 7/8/10/11 e Windows Server
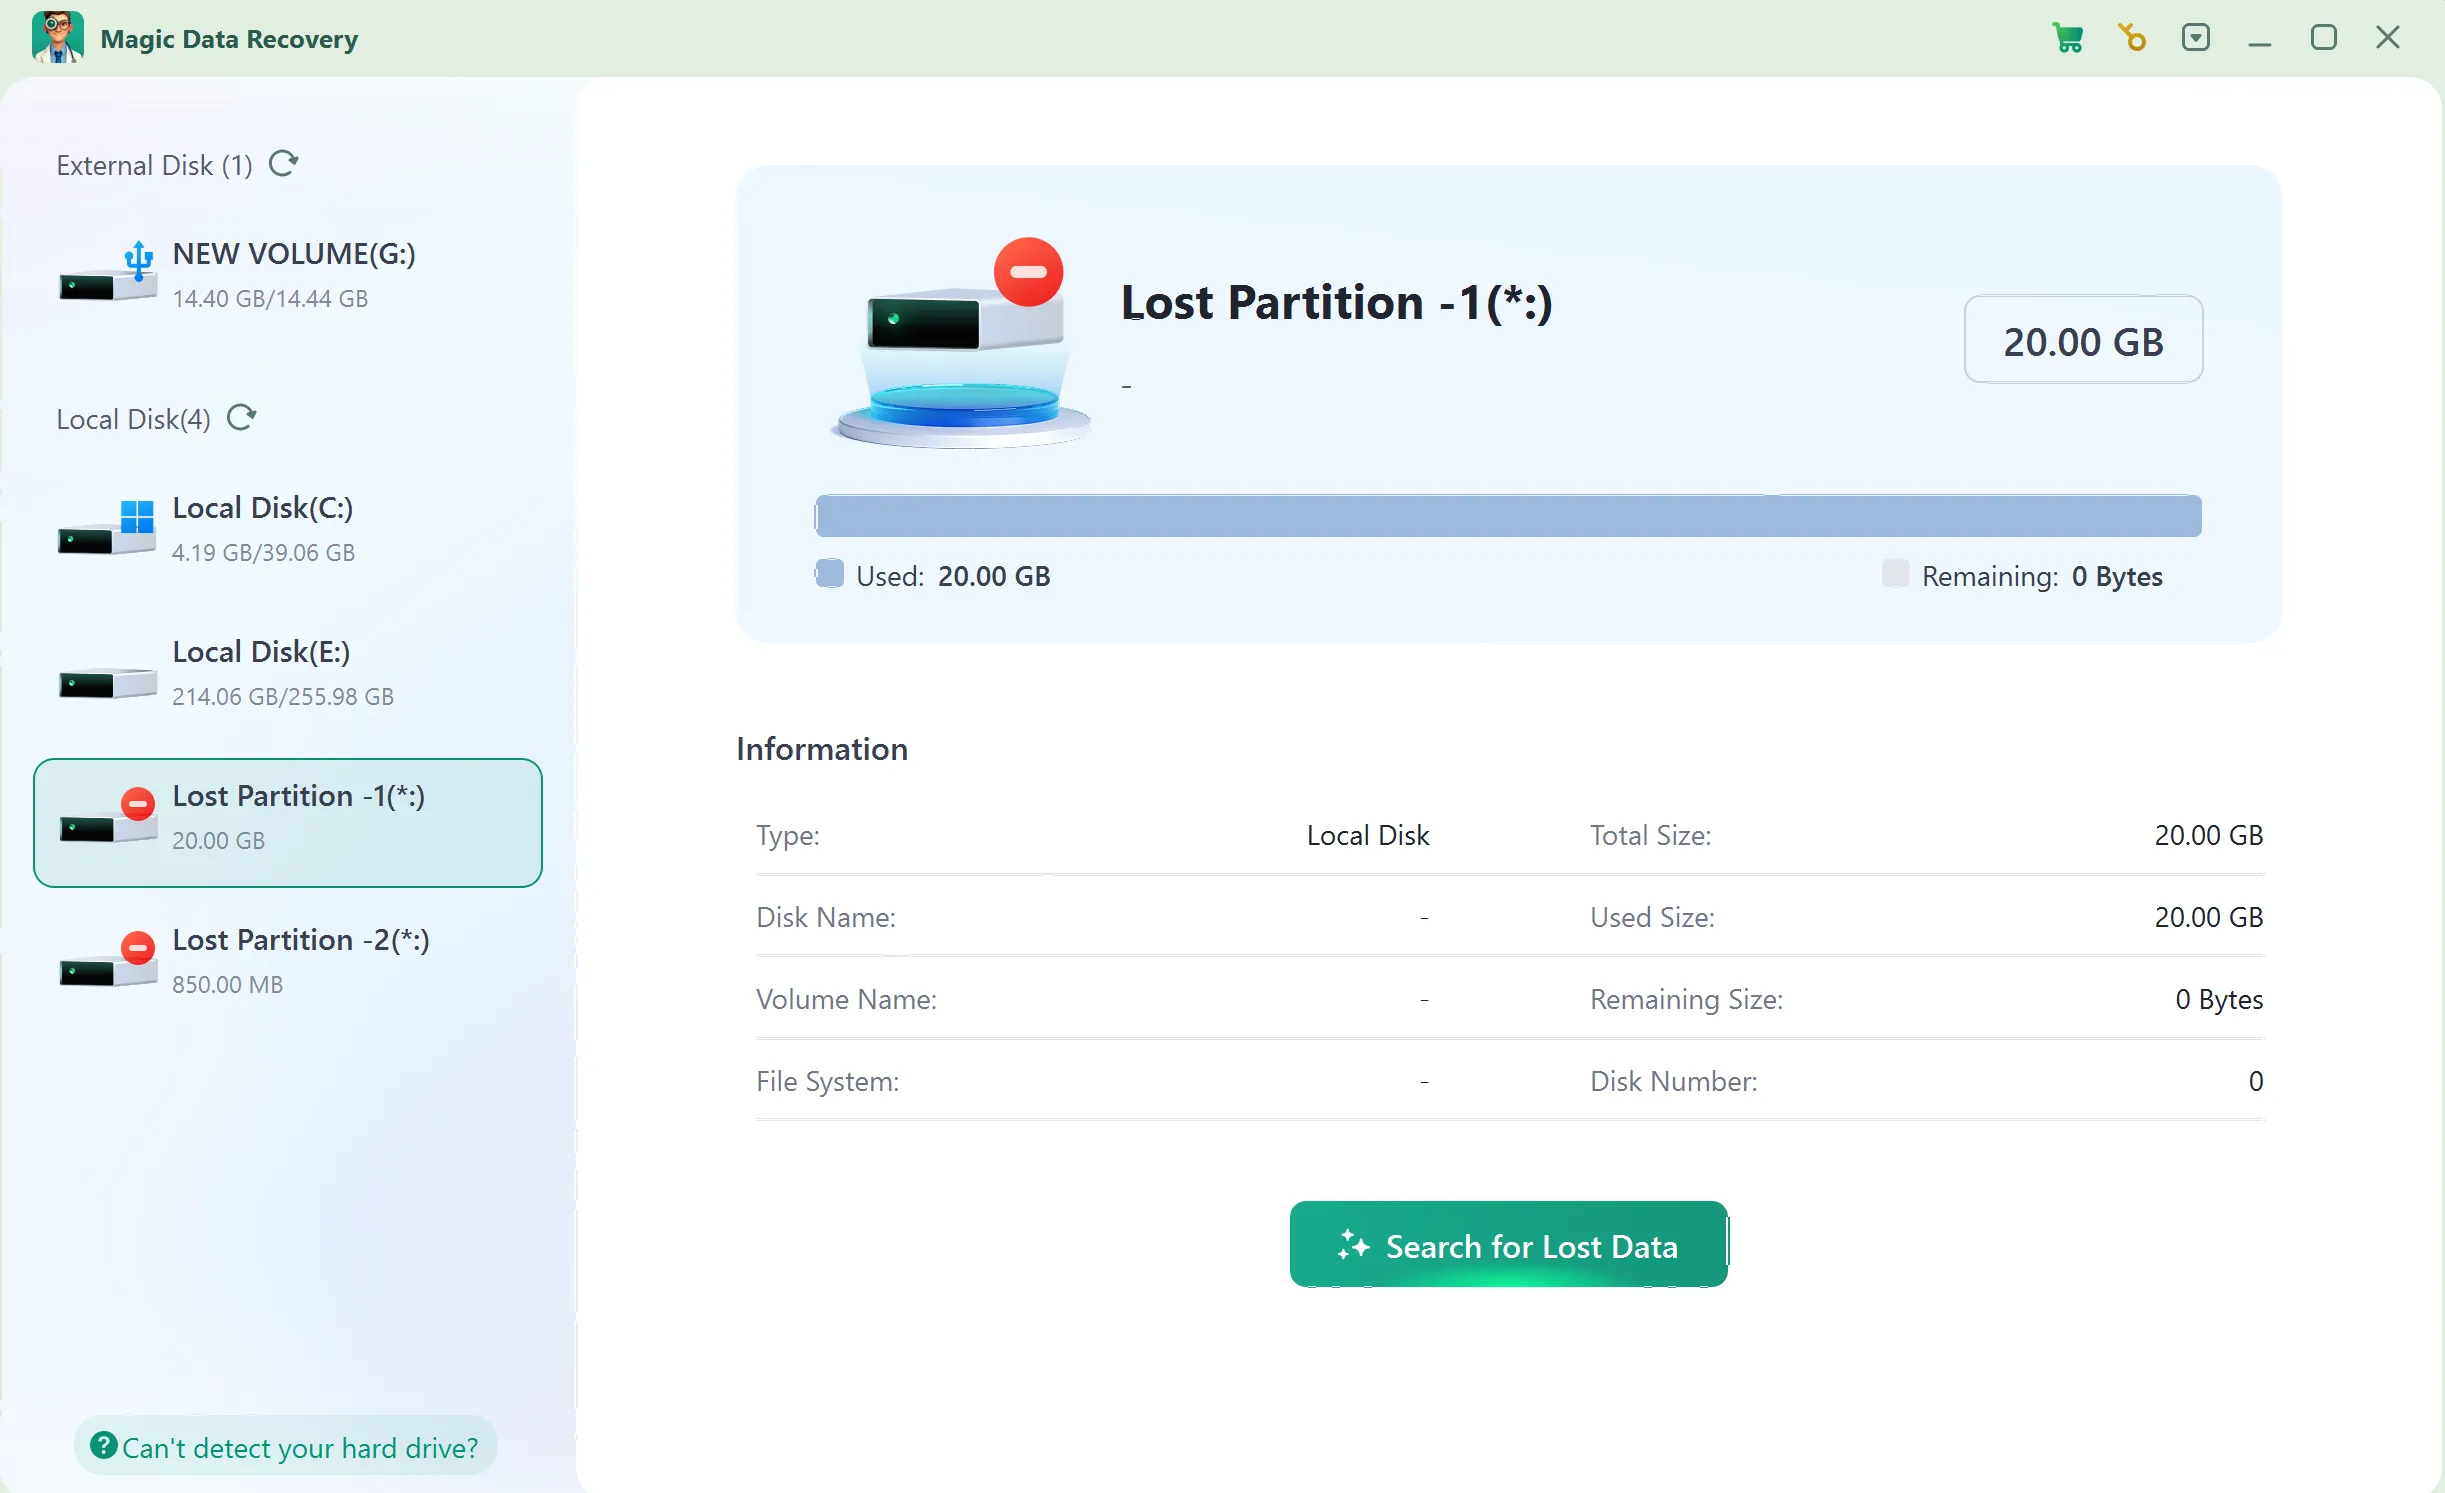
Step 2: Select the Healthy Cloned Drive
Launch the software and select the Windows-recognized disk clone or partition, not the physically failing source, then start the scan.
Step 3: Scan for Missing Files
Let the scan identify potentially recoverable documents, photos, and other files; results depend on the condition of the copied sectors.
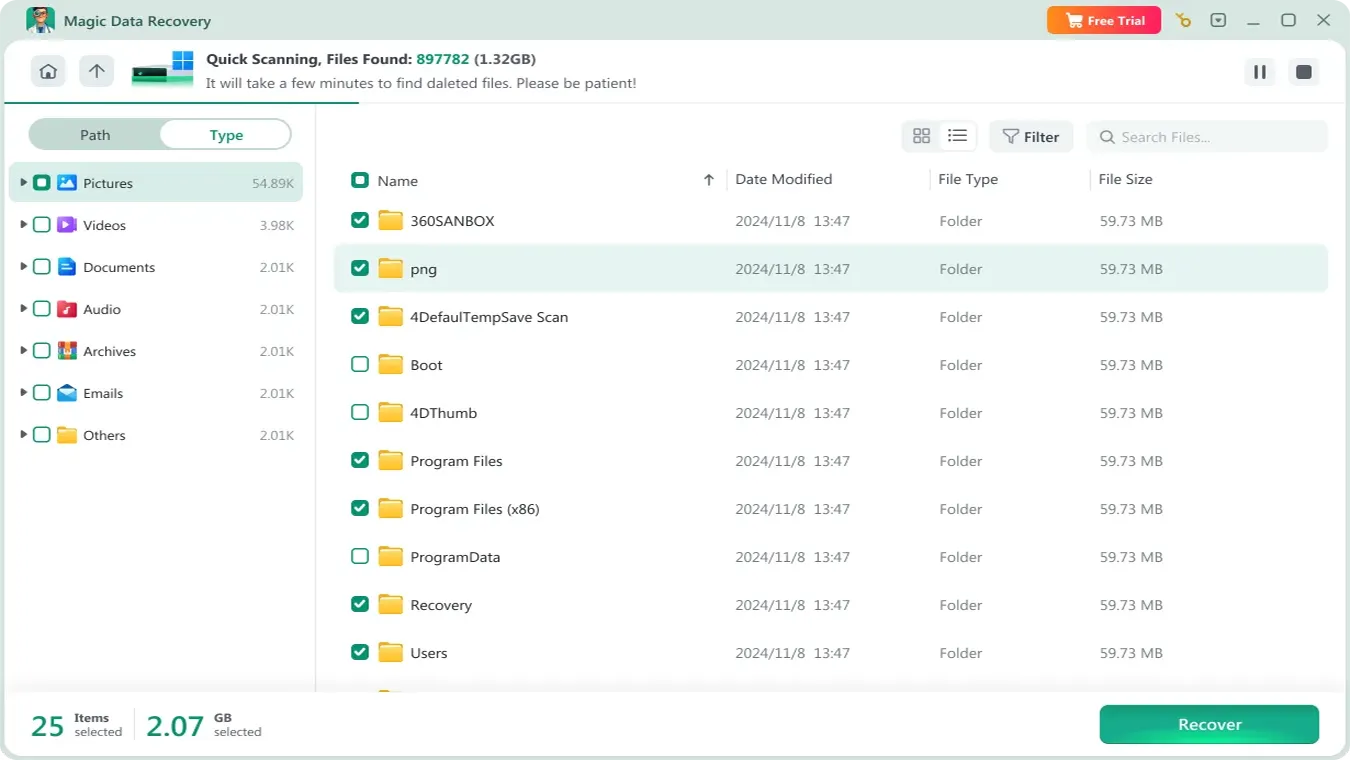
Etapa 4: Visualizar arquivos antes da recuperação
Where preview is available, open a sample to check that its contents are recognizable; not every damaged file can be previewed.

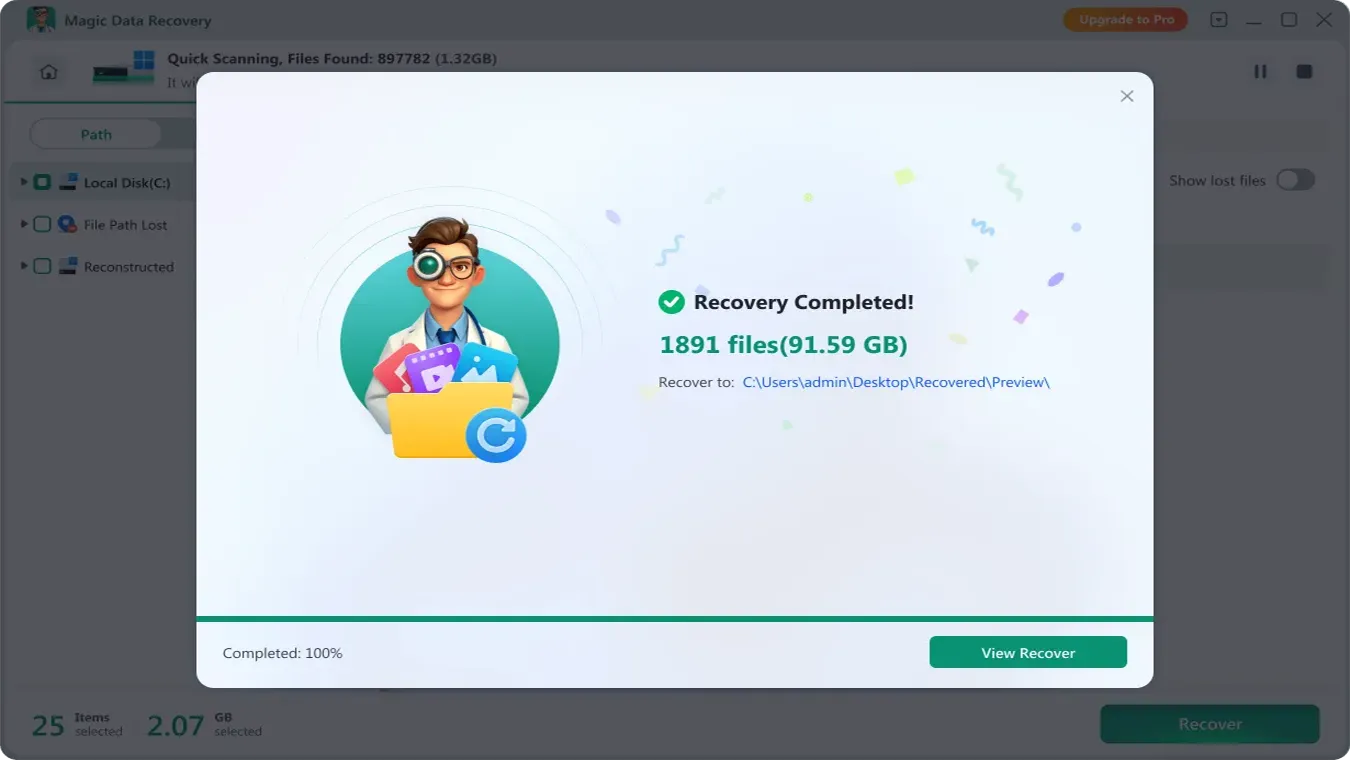
Etapa 5: Recuperar arquivos em outra unidade
Save selected results to a separate healthy disk, not back to the clone, and verify the recovered files in their normal applications.
What If GNU ddrescue or File Recovery Fails?
First, check whether you selected the correct source and whether the missing data was ever present on that device. Next, retain the image and mapfile so you do not lose progress. If the clone is readable but the file system is not, investigate its structure on a duplicate image rather than repeatedly modifying the master.
However, if an SSD has discarded deleted blocks through TRIM, or new data has overwritten them, more software scans cannot recreate the original content. Likewise, if a hard disk clicks, disconnects, or becomes progressively less readable, discontinue retries and ask a qualified lab about professional imaging.
Prevent Another Emergency Rescue
- Maintain an independent backup with periodic restore checks; synchronization alone may copy accidental deletions.
- Watch for unusual drive noises, read errors, and changing SMART indicators, but avoid lengthy tests on a clearly failing disk.
- Label critical drives and keep notes on drive model and serial number to prevent source/destination mistakes.
- Store rescue images and their matching mapfiles together on healthy storage.
- Replace unstable drives after extracting and verifying important data; imaging is not hardware repair.
For more context on storage defects, see how to fix bad sectors on a hard drive—but complete data rescue before any repair attempt.
Conclusão
GNU ddrescue is most useful when a readable but failing drive cannot complete ordinary file copies. Diagnose the symptoms first, protect the original disk, produce a sector-level image with a mapfile, and verify real file contents on the copy. If folders open and your files are intact, no additional recovery tool is necessary.
If the healthy clone still contains deleted or logically inaccessible files, Magic Data Recovery offers a separate Windows file-recovery step—not a replacement for careful imaging. For related drive-specific guidance, visit our hard drive recovery hub.
Compatível com Windows 7/8/10/11 e Windows Server
PERGUNTAS FREQUENTES
Para que o GNU ddrescue é usado principalmente?
O GNU ddrescue consegue recuperar arquivos excluídos permanentemente?
O que acontece se eu perder o arquivo de mapa do ddrescue?
O GNU ddrescue funciona no Windows 10 e no Windows 11?
O fato de o 100% ter sido recuperado significa que todos os arquivos serão abertos?
Qual é a diferença entre ddrescue -n e -N?
-n significa --no-scrape, que dispensa a fase detalhada de extração de dados, enquanto -N significa --sem varredura, o que evita a fase de varredura. Versões anteriores atribuíam -N de maneira diferente. Portanto, copiar comandos de um tutorial antigo pode alterar a forma como o ddrescue lida com áreas problemáticas. Sempre verifique a versão instalada localmente e a saída do comando “help” antes de usar essas opções.O ddrescue consegue recuperar arquivos de um SSD após o TRIM?

Vasilii é um especialista em recuperação de dados com cerca de 10 anos de experiência prática na área. Ao longo de sua carreira, ele resolveu com sucesso milhares de casos complexos envolvendo arquivos excluídos, unidades formatadas, partições perdidas e sistemas de arquivos RAW. Sua experiência abrange métodos de recuperação manual usando ferramentas profissionais, como editores hexadecimais, e soluções automatizadas avançadas com software de recuperação. A missão do Vasilii é tornar o conhecimento confiável sobre recuperação de dados acessível tanto para profissionais de TI quanto para usuários comuns, ajudando-os a proteger seus valiosos ativos digitais.