
Ultimate Guide to Dell Recovery Without Data Loss

A blue screen of death, an endless boot loop, or a sudden system crash on your laptop can be incredibly stressful. When your computer fails, you will likely turn to native crashed OS solutions like a official Dell recovery. Consequently, you might start searching for your Dell recovery media or try downloading the Dell OS recovery tool to get Windows back up and running. However, a major hidden danger exists with these traditional system restoration methods. Standard system recovery processes often completely format your drive, meaning you could permanently lose all your irreplaceable photos, projects, and documents.
Fortunately, you can fix your operating system and completely protect your personal files at the same time. This comprehensive guide will walk you through the exact technical steps to perform a Dell recovery safely. Furthermore, we will reveal how to proactively rescue your files using a dedicated software solution called Magic Data Recovery before a factory wipe destroys them.
Supports Windows 7/8/10/11 and Windows Server
Table of Contents
What is Dell Recovery & Do You Need Dell Recovery Media?
To understand how to fix your computer, you must first understand the utilities at your disposal. Dell provides built-in environments designed to re-image a corrupted operating system. Typically, users encounter two primary methods: automated cloud recovery and physical USB deployment.
Understanding the Built-in Options
When your laptop behaves unstable but still boots into Windows, you can initiate a basic system restore. This process rolls back system files to a previous healthy state. Conversely, if your computer experiences a catastrophic boot failure, you must rely on a deeper environment known as SupportAssist OS Recovery.
The Role of Physical Recovery Media
What happens if the internal recovery partition on your hard drive becomes corrupted? In this severe scenario, you must deploy a external Dell recovery media. This external medium is a bootable USB drive containing a clean image of your original operating system. You can create this flash drive using the official Dell OS recovery tool downloaded from another working computer.
The Hidden Data Trap
Although these utilities are excellent for reviving dead hardware, they present a significant threat to your data storage. A standard factory restore does not just fix system errors; it completely overwrites the existing partitions. Therefore, if you execute a recovery without a prior backup, your operating system will be clean, but your personal user data folder will be entirely empty.
Scenario 1: How to Use Dell SupportAssist OS Recovery
If your computer cannot boot into the Windows desktop, you can usually access the internal SupportAssist environment. This local platform allows you to diagnose hardware issues and reinstall the original software image.
Follow these step-by-step instructions to navigate the native console:
- Turn off your laptop completely by holding down the power button.
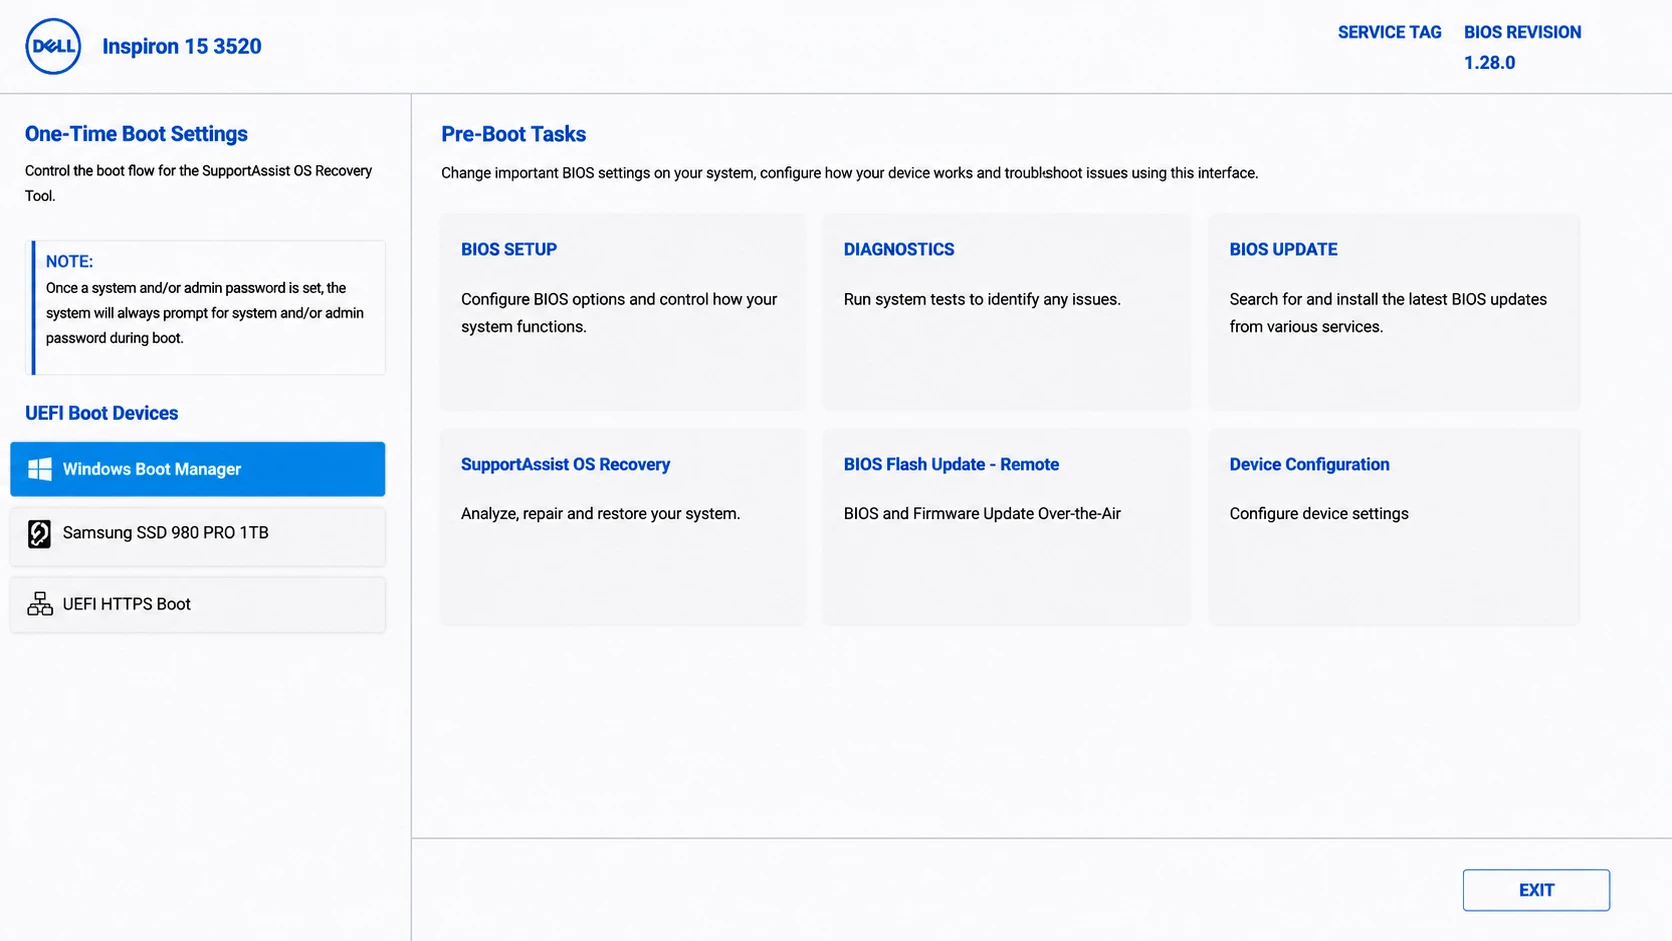
- Press the power button to turn the machine back on, and immediately begin tapping the F12 key repeatedly at the Dell logo screen.
- A one-time boot menu will appear on your screen. Use your arrow keys to select SupportAssist OS Recovery, and then press Enter.
- Wait for the system to load the specialized environment dashboard.
- Click on the Restore System or Recover OS option depending on your specific firmware version.
At this specific stage, the local wizard will prompt you to back up your personal files before proceeding with the Windows reinstallation. However, many users report that the built-in backup module frequently freezes, crashes, or fails to recognize external backup drives. If you encounter a backup failure inside this environment, do not hit the next button, because doing so will trigger an immediate hard drive wipe.
Scenario 2: How to Create and Use External Dell Recovery Media
If your local hard drive is completely unresponsive or the internal recovery partition is missing, you must build external Dell recovery media. This process requires a secondary, fully functional Windows computer and a blank USB flash drive with at least 16GB of storage capacity.
Step 1: Generate the Tool
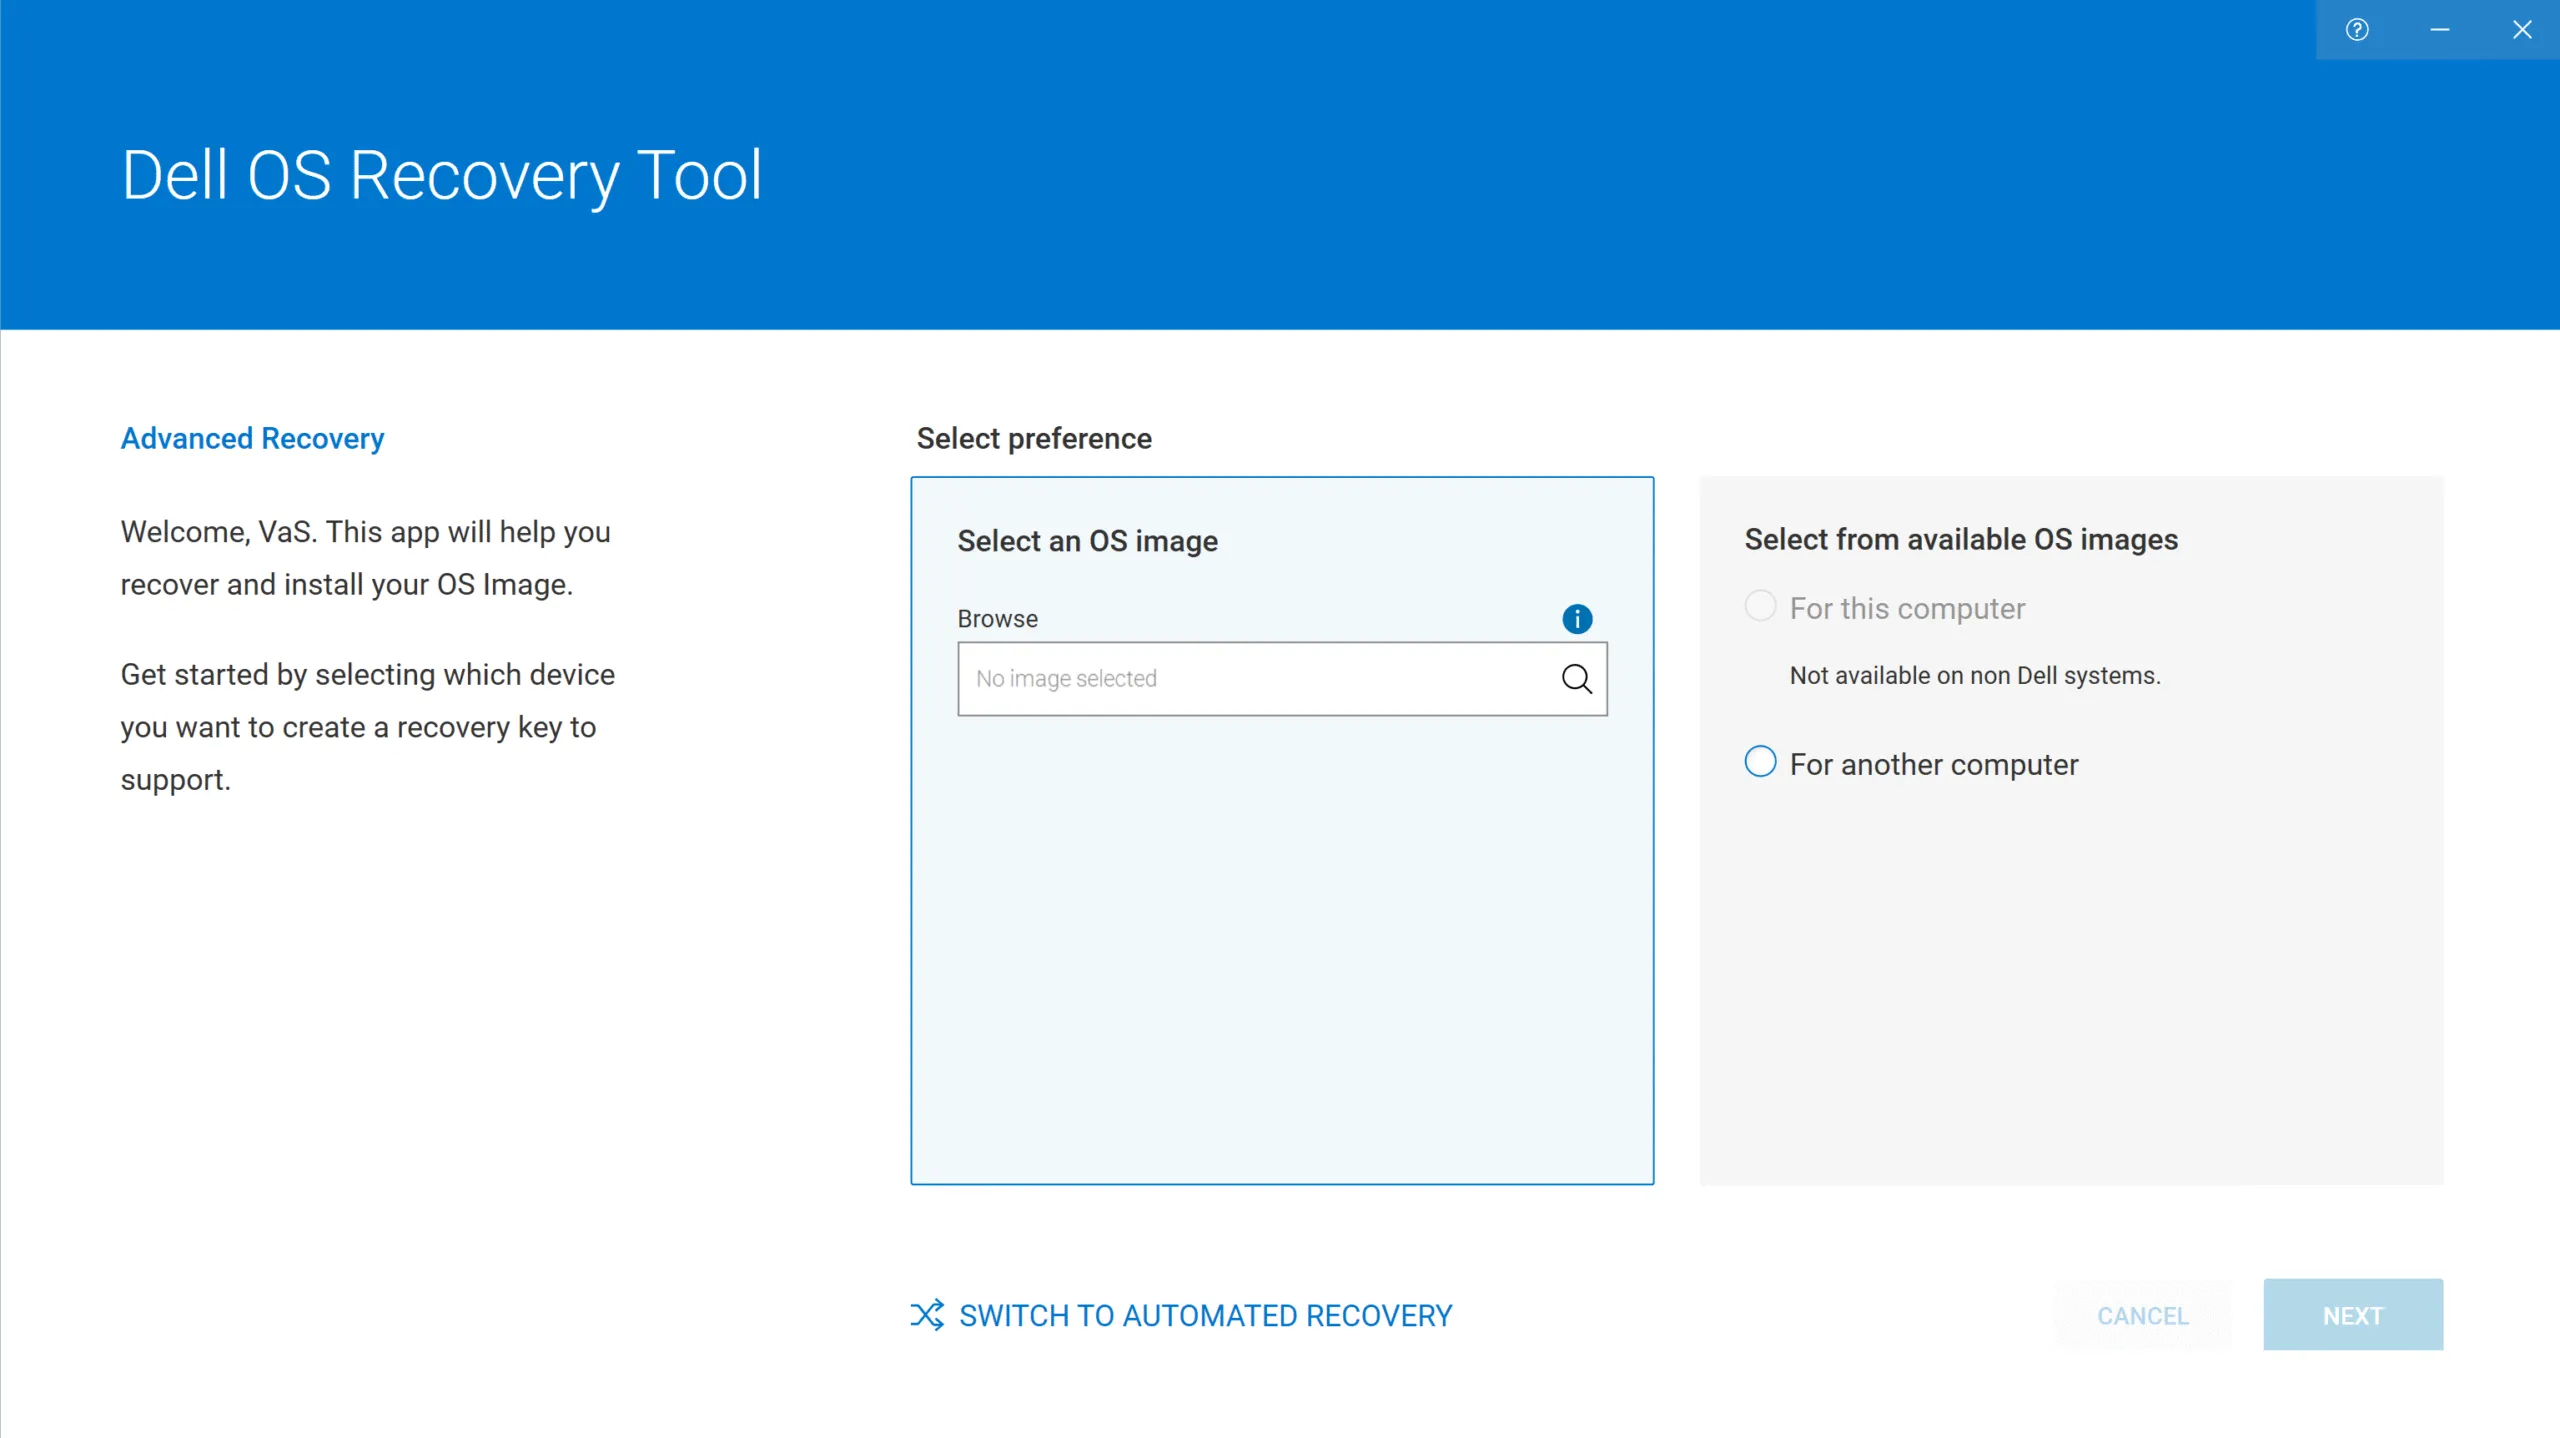
First, plug your blank USB flash drive into the secondary working computer. Open your web browser, navigate to the official support website, and download the executable file for the Dell os recovery tool. Launch the application after installation completes.
Step 2: Download the OS Image
The application will ask you to identify the broken computer. Enter the unique 7-character Service Tag of your broken laptop into the input field. The utility will automatically identify the exact Windows version that shipped with your hardware. Select your plugged-in USB drive, accept the formatting warning, and click download to write the ISO recovery image onto the drive.
Step 3: Boot From the USB
Unplug the newly created USB drive and insert it into a port on your broken laptop. Turn on the broken machine while tapping the F12 key to launch the boot menu again. This time, select your USB flash drive from the list of storage options. The computer will now boot directly from the external flash media, allowing you to trigger the operating system reinstallation wizard.
The Major Risks of Using Official Dell Recovery Utilities
While utilizing an official automated tool seems like the easiest option, it introduces major operational risks. Understanding these technical hurdles can save you from a permanent data loss disaster.
- Media Creation Failure: The creation utility often throws cryptic error codes midway through downloading large operating system images.
- System Freezes: Unstable hard drive sectors can cause the reinstallation script to hang indefinitely at 50% completion, leaving your computer in a non-bootable state.
- Irreversible Overwriting: Choosing the factory reset option initiates a full disk format. When a new operating system is written over your old sectors, finding your original file fragments becomes incredibly difficult.
If you find yourself stuck in a loop of system crashes, or if you accidentally ran the recovery script without saving your files, you need a dependable strategy to recover data from dell laptop hard drives safely.
How to Safeguard Your Files with Magic Data Recovery
Instead of risking your personal files with unpredictable system tools, a proactive data extraction strategy is always the safest path. This is precisely where Magic Data Recovery becomes an essential asset in your emergency toolkit. Rather than waiting for a destructive reinstallation to finish, you can use this professional utility to securely extract your files beforehand. Additionally, if you have already completed a factory reset and realized your data vanished, this software can scan beneath the fresh Windows layer to retrieve your original documents.
Why This Tool Outperforms Standard Alternatives
Unlike standard system recovery scripts that prioritize operating system files over user data, this utility focuses entirely on file preservation. It is a highly specialized, Windows-based data rescue platform built to handle deeply corrupted file structures. If your computer fails to boot, you can simply remove the hard drive, connect it to a secondary computer via a USB enclosure, and let the software run a safe read-only operation, although some files have been overwritten during system recovery.
Unique Product Advantages
- Advanced Deep Scanning: The algorithmic engine bypasses damaged system tables to piece together fragmented files like images, videos, and complex database files.
- Risk-Free Trial Limit: The program features a generous 500MB free data restoration limit, allowing you to preview and salvage your most critical documents completely free of charge before deciding to upgrade.
- No Technical Experience Required: The user-friendly interface guides you through a clear, point-and-click extraction process that requires zero IT training.
If you are currently looking for a highly efficient and secure solution to protect your personal files from a system wipe, you should download Magic Data Recovery to experience a stress-free file rescue process.
Step-by-Step: Extracting Data From Your Drive Before a Dell Recovery
Rescuing your valuable information does not have to be a complicated task. Follow these clear steps to safely recover data from dell laptop partitions:
Step 1: Download and Install Magic Data Recovery
First, download Magic Data Recovery and install it on a working machine or a separate healthy partition. This proactive approach prevents accidental overwriting and carefully protects your lost data during the setup process.
Supports Windows 7/8/10/11 and Windows Server
Step 2: Select the Dell Partition to Scan
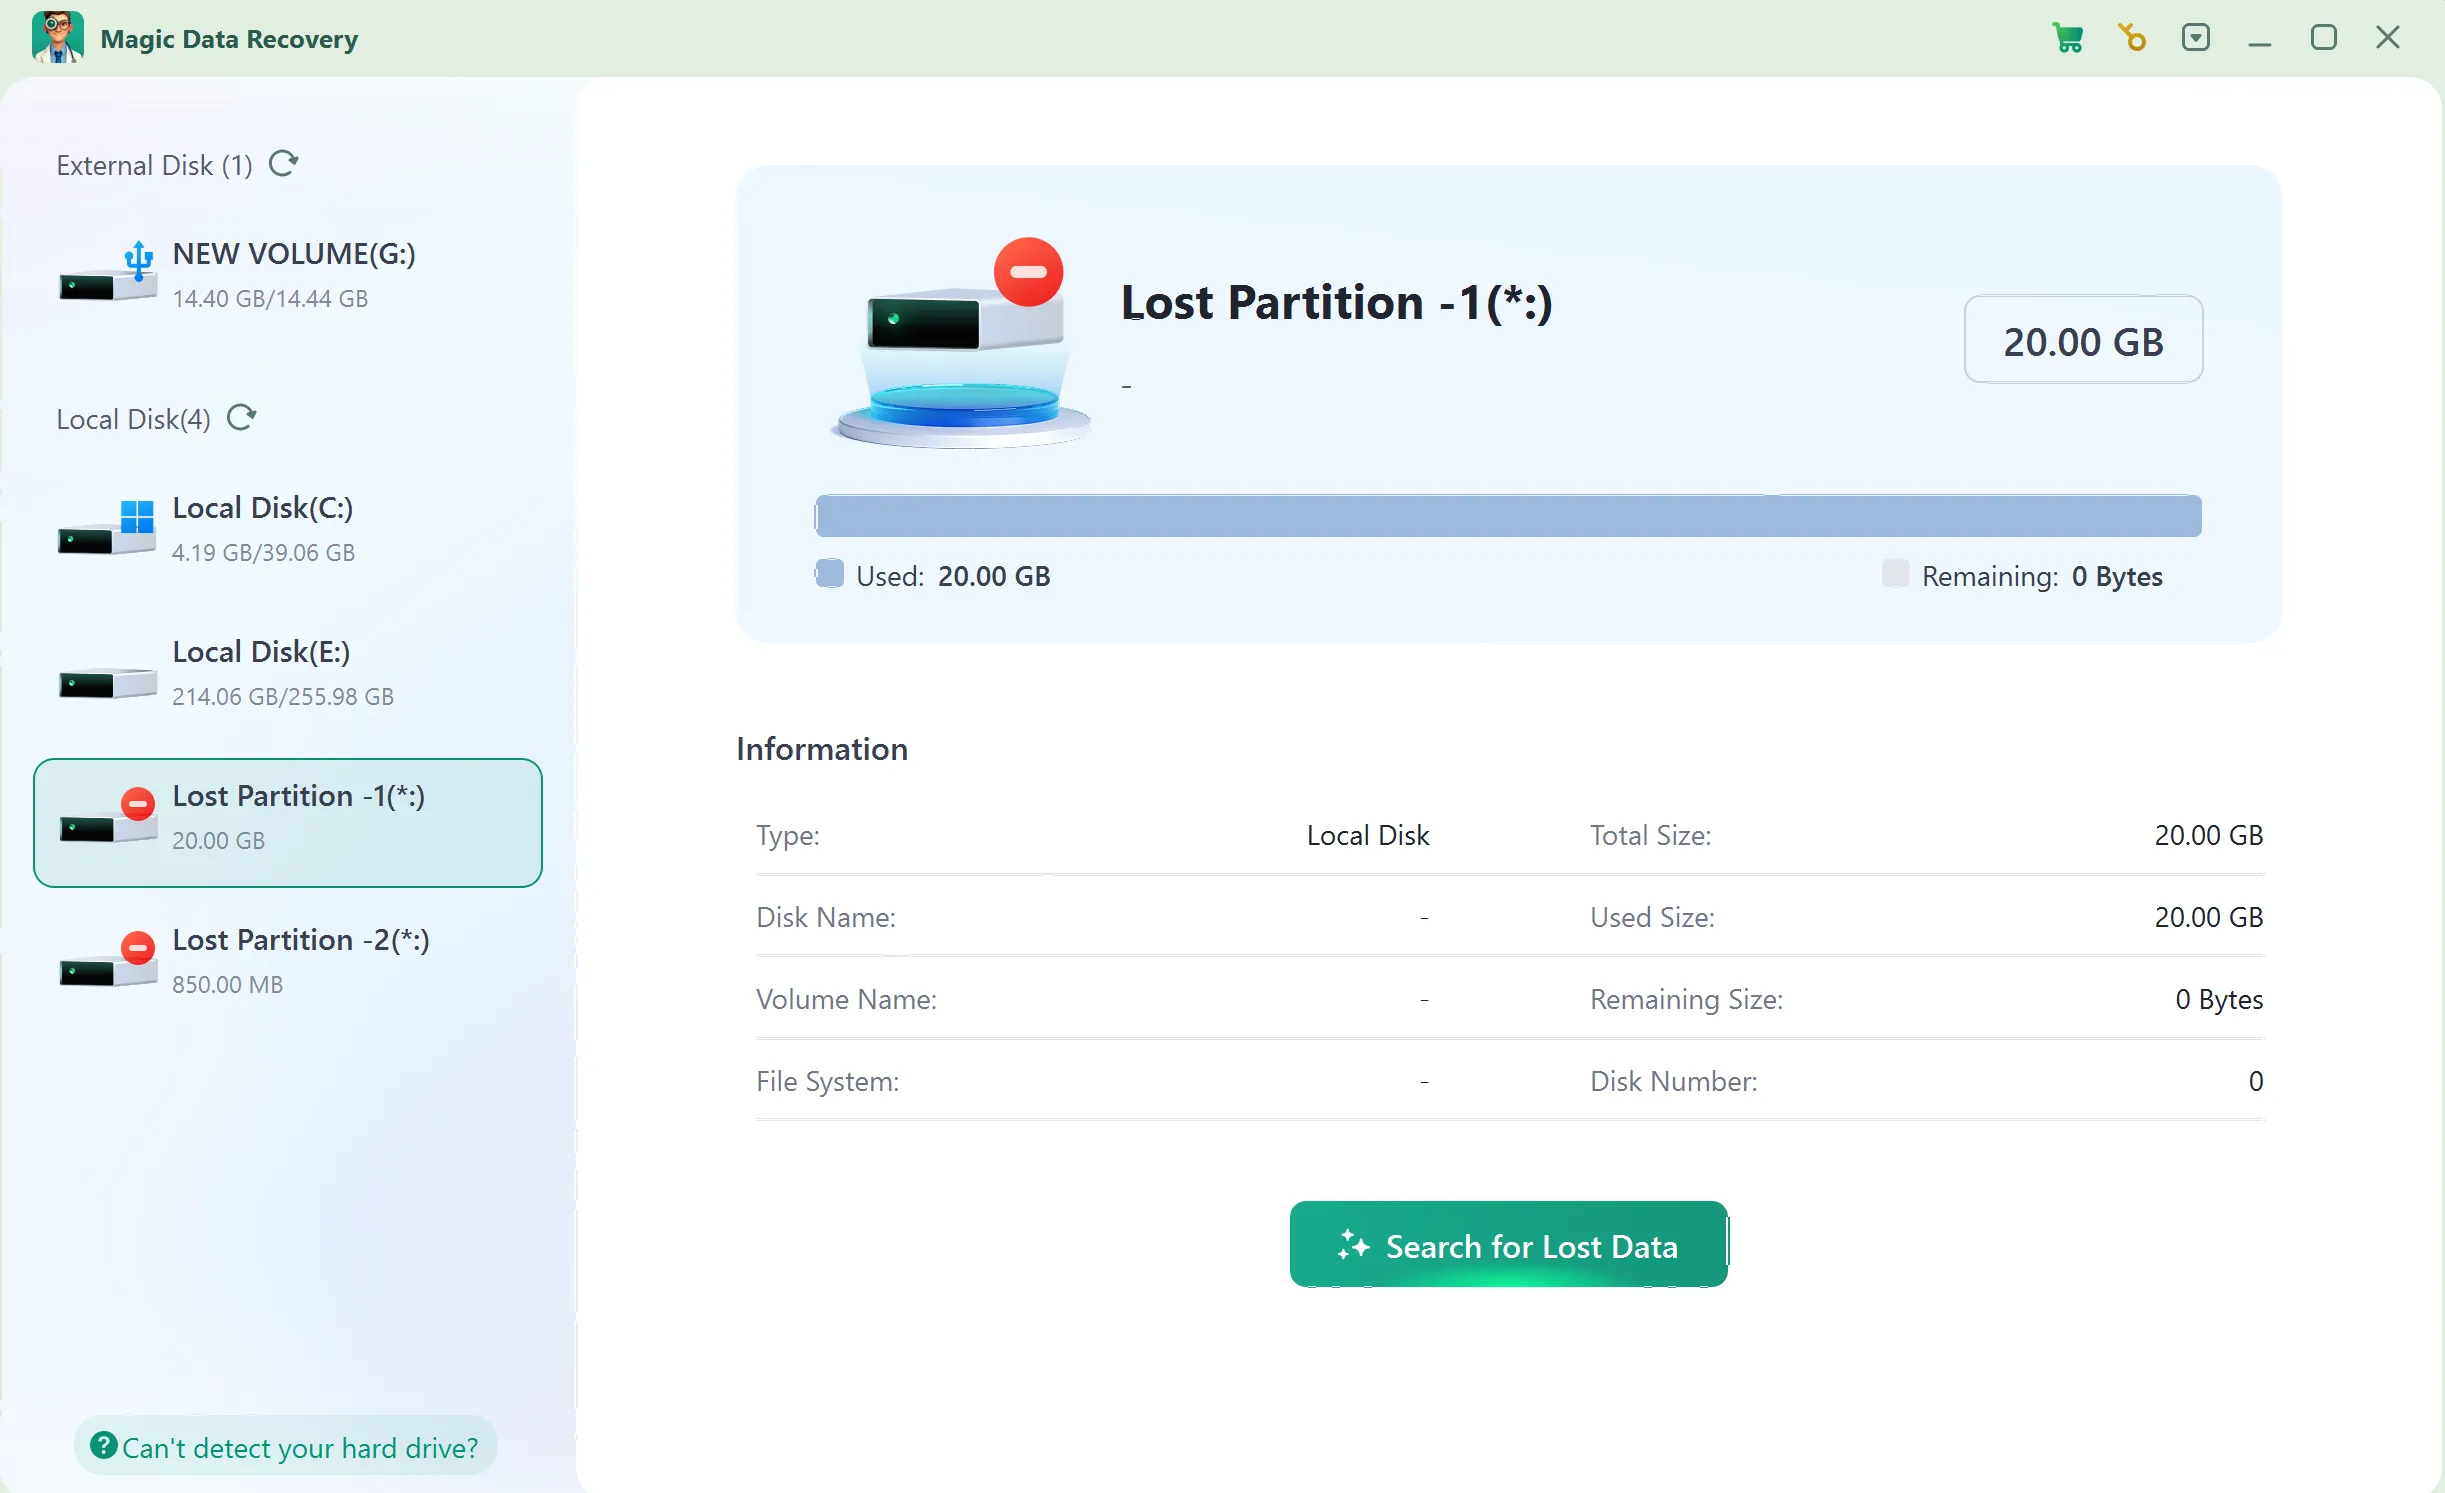
Launch the software to open the main user interface. From the available storage map, choose the specific local partition on your computer where your files were deleted or lost, and then start the scan.
Step 3: Scan the Hard Drive for Lost Files
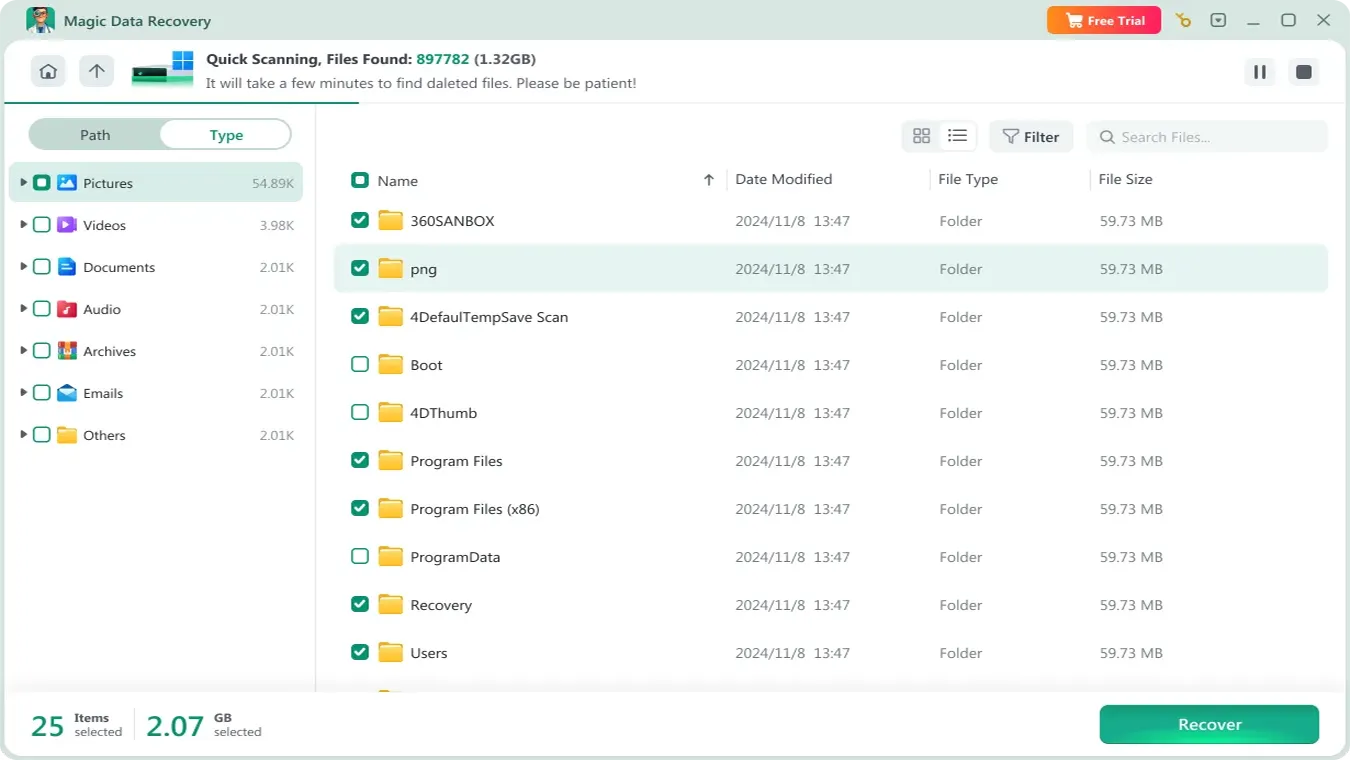
The utility automatically initiates an Advanced Scan across your storage sectors. Meanwhile, it carefully organizes and lists all recoverable files in real time as the scan progresses.
Step 4: Preview Files Before Recovery
Next, utilize the built-in preview function to check the actual file contents before saving them. This important step ensures you recover only the specific photos, spreadsheets, or documents you actually need.

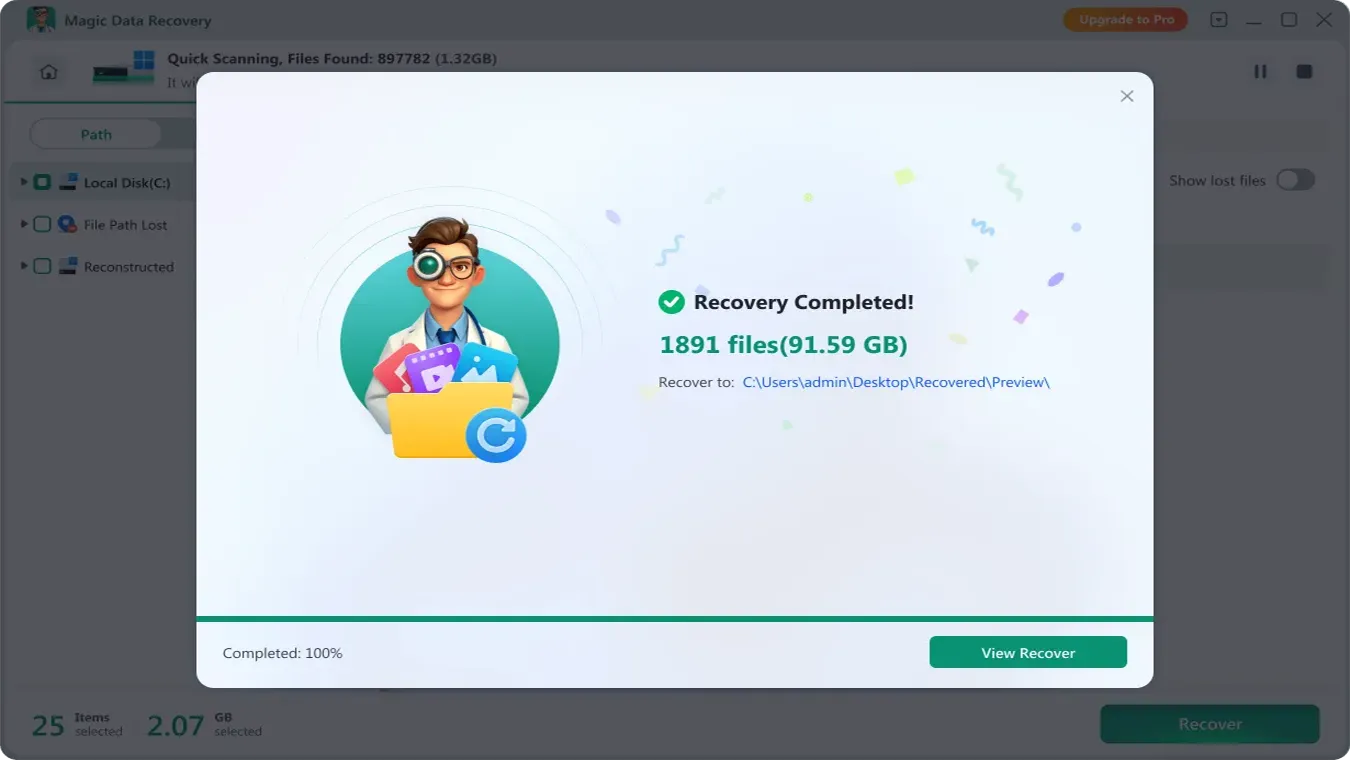
Step 5: Recover Files to a Safe Location
Finally, mark the checkboxes next to your target files and save them to an entirely different drive or backup device. Never restore data directly to the same corrupted partition, because doing so risks permanent data corruption.
Technical Tips to Prevent Sudden System Failures
Experiencing a major system crash serves as a strong reminder to reinforce your digital habits. Implementing a few industry best practices will dramatically reduce the likelihood of needing a hard Dell recovery in the near future.
- Monitor S.M.A.R.T. Attributes: Install a lightweight hardware monitor to keep an eye on your storage health scores regularly. Sudden drops in health scores indicate that your drive is physically wearing out.
- Isolate System Changes: Always create a manual system restore point before installing new software utilities or specialized device drivers.
- Keep Core Software Updated: Let Windows Update manage security patches automatically to avoid file system corruption issues.
- Implement the 3-2-1 Backup Strategy: Keep three copies of your files, stored across two different types of media, with at least one copy kept in a secure off-site or cloud location.
Conclusion
Encountering an operational error that requires a full Dell recovery can feel incredibly disruptive. Standard internal factory tools and external Dell Recovery media are highly effective at fixing corrupted Windows files, but they do not care about your personal data folders. Running these tools blindly often leaves you with an empty hard drive and a massive data loss problem.
For this reason, we highly recommend incorporating Magic Data Recovery into your system repair routine. By taking advantage of its safe read-only scanning architecture and its 500MB free recovery, you can confidently check and rescue your most valuable files before making any permanent modifications to your operating system. Protect your digital life today by downloading the professional file rescue software before you begin your next crashed OS repair.
Supports Windows 7/8/10/11 and Windows Server
FAQs About Dell Recovery Solutions
Can I run the official Dell OS recovery tool on a macOS computer?
No, the creation software is a native Windows-based utility. If your only working machine is a Mac, you will need to configure a Windows virtual machine environment or borrow a Windows PC from a friend to create the flash media drive.
Will running an automated cloud restore erase my software licenses?
Yes, a full factory reinstallation restores the machine to its original warehouse state. Consequently, you will need to re-enter your activation keys and log back into your subscription accounts after the process finishes.
What should I do if the USB creation utility hangs at 99%?
This common issue usually points to an unstable internet connection or an older flash drive with bad sectors. Try disabling your local third-party antivirus software temporarily, or swap out your current flash drive for a high-quality USB 3.0 stick.
Can I recover files after executing a full factory reset on my laptop?
Yes, you can often retrieve most items if you use professional tools like Magic Data Recovery immediately, even though some files have been overwritten after factory reset. However, you must avoid downloading new applications or saving the recovered files on the drive to prevent writing over the hidden remains of your original data.
Is it safe to use a generic USB flash drive for system recovery?
Yes, any standard USB drive works perfectly as long as it has at least 16GB of capacity. However, you must remember that the creation tool formats the flash drive completely, deleting all existing files on it.
Why does the official SupportAssist backup option sometimes freeze during deployment?
This freezing typically occurs due to corrupted system directories or physical errors on your hard drive. When the native tool encounters unreadable blocks, it stops completely, making independent software solutions necessary.

Vasilii is a data recovery specialist with around 10 years of hands-on experience in the field. Throughout his career, he has successfully solved thousands of complex cases involving deleted files, formatted drives, lost partitions, and RAW file systems. His expertise covers both manual recovery methods using professional tools like hex editors and advanced automated solutions with recovery software. Vasilii's mission is to make reliable data recovery knowledge accessible to both IT professionals and everyday users, helping them safeguard their valuable digital assets.