
How to Delete Recovery Partition in Windows 11/10

Managing disk space effectively is a common challenge for many Windows users. You might notice a mysterious slice of your hard drive labeled as a “Recovery Partition” that seems to sit idle while your C drive screams for more space. Many users find themselves stuck because the standard Disk Management tool often prevents you from removing these blocks, leaving them wondering how to delete recovery partition without breaking their system.
While these partitions serve a purpose, they can often be safely removed if you know the right steps and have the right backup tools. In this comprehensive guide, we will explore the safest methods to delete recovery partition and how to protect your data using Magic Data Recovery if things go wrong.
Supports Windows 7/8/10/11 and Windows Server
Table of Contents
What is a Recovery Partition and Why is it Locked?
Before you decide to delete recovery partition, you must understand what you are removing. A recovery partition is a dedicated portion of your hard drive that holds system restoration files. If your Windows OS fails to boot, this partition allows you to restore the factory settings.
However, many users want to delete recovery partition because it can take up several gigabytes of valuable space, especially for SSDs. The primary frustration arises when you open Disk Management, right-click the partition, and find that the “Delete Volume” option is greyed out. Windows protects this area to prevent accidental deletion, but with the right commands, you can bypass this restriction.
Why Windows Creates a Recovery Partition
Every time you install Windows or perform a major update, the system checks for a viable Windows Recovery Environment (WinRE). If it doesn’t find enough contiguous space, it creates a new one. This explains why you may have many healthy recovery partitions appearing on a single disk after years of updates. These redundant partitions often do nothing but clutter your drive.
How to Delete Recovery Partition Using Diskpart
Since the graphical user interface (GUI) often fails, the most reliable way to delete recovery partition is through the Command Line Interface (CLI) using a tool called Diskpart. This method is powerful and bypasses Windows’ standard safety locks.
Step-by-Step Guide: How to Delete Recovery Partition
Follow these steps carefully. Using the wrong command on the wrong partition can result in permanent data loss.
1. Open Command Prompt as Administrator: Press the Windows key, type “cmd”, right-click the result, and select “Run as administrator”.
2. Launch Diskpart: Type diskpart and press Enter.
3. Locate Your Disk: Type list disk to see all connected drives. Identify the disk number (usually Disk 0 or Disk 1).

4. Select the Disk: Type select disk X (replace X with your actual disk number).
5. View Partitions: Type list partition. Look for the partition labeled “Recovery” or one that matches the size of the partition you want to remove.
6. Select the Partition: Type select partition X.
7. Delete the Partition: To delete recovery partition specifically, a standard delete command won’t work. You must use the override parameter. Type: delete partition override.
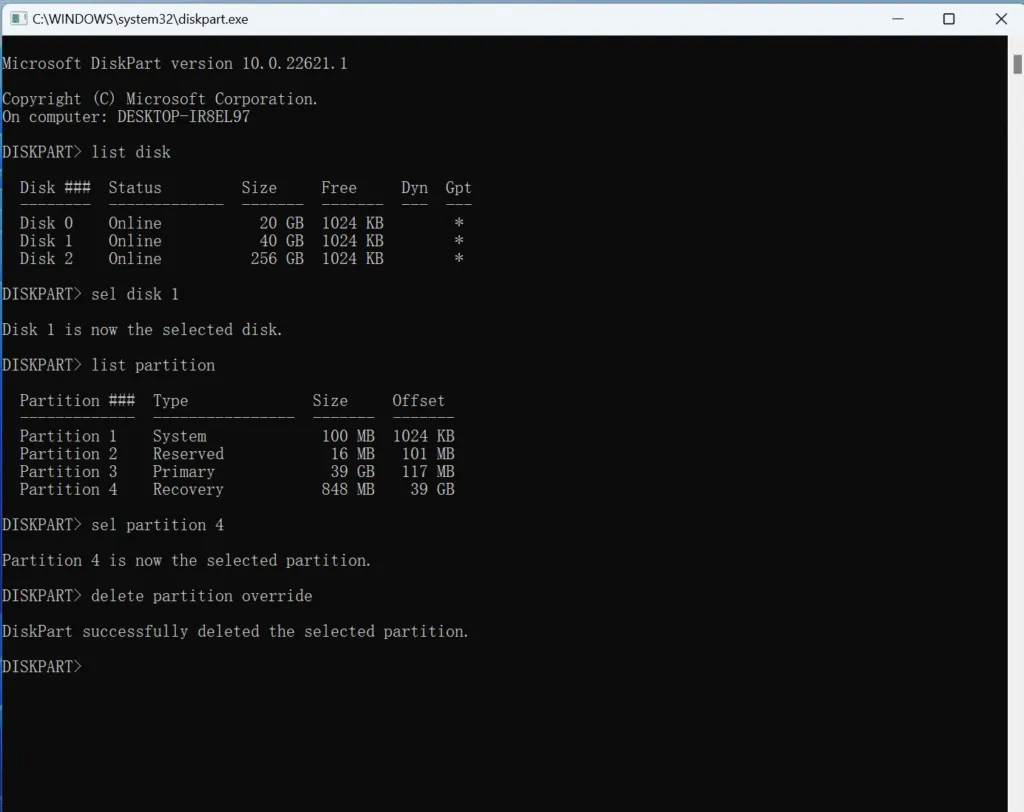
Once you see the message “Diskpart successfully deleted the selected partition,” the space will appear as “Unallocated” in Disk Management, allowing you to extend your C drive.

The Risks: What if You Delete the Wrong Partition?
While the Diskpart method is effective, it carries significant risk. Command-line tools do not ask for confirmation via a “Recycle Bin.” One typo in the partition number could lead to the immediate deletion of your primary data drive or an essential EFI boot partition.
Furthermore, if you delete recovery partition and later encounter a “Blue Screen of Death” (BSOD), you may find yourself unable to repair the system without a physical USB recovery drive. This is where professional-grade recovery software becomes an essential part of your toolkit.
Protecting Your Data with Magic Data Recovery
If you accidentally deleted a partition or realized you had important files stored on a volume you just wiped, Magic Data Recovery is the professional lost partition data recovery solution you need. Unlike standard undelete tools, this software is specifically designed to handle complex partition loss scenarios.
Why we recommend Magic Data Recovery:
- Deep Partition Scanning: It can locate and reconstruct lost or deleted partitions that the Windows OS can no longer see.
- Comprehensive File Support: Whether you lost system files, photos, or documents during the delete recovery partition process, the tool supports hundreds of file formats.
- User-Friendly Interface: You don’t need to be a command-line expert to use it. The wizard-driven interface guides you through the recovery process safely.
- Risk-Free Preview: You can see which files are recoverable before committing to the full restoration.
If you are currently looking for a way to get your data back after a disk management mishap, Magic Data Recovery provides a reliable safety net that manual Windows tools simply cannot offer.
How to Use Magic Data Recovery
If you accidentally delete recovery partition data that contained important files, or if the process caused your drive to become “RAW”, you need a professional recovery plan. While Windows tools focus on destruction, Magic Data Recovery focuses on restoration.
Follow these professional steps to safeguard your data during disk optimization:
1. Prioritize Installation Safety: To begin, download and install the software on a healthy drive. You must avoid installing it on the disk where you intend to delete a recovery partition in Windows, as this prevents overwriting any “invisible” data that is still recoverable.
Supports Windows 7/8/10/11 and Windows Server
2. Target the Affected Disk: Open the application and choose the hard drive where you lost data.
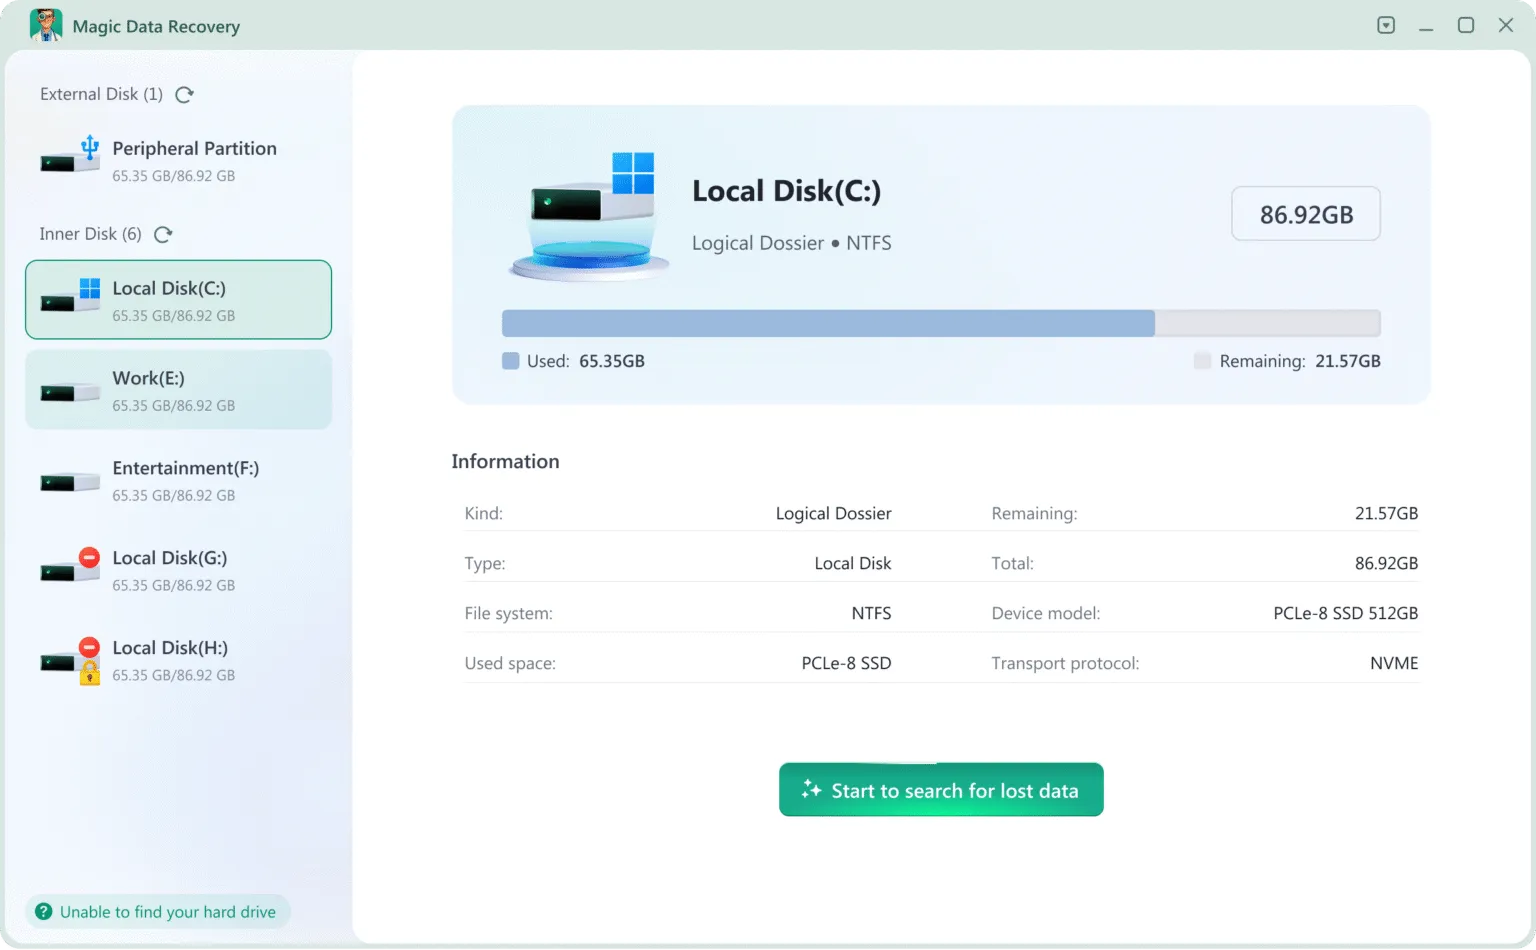
3. Perform a Scan: Once you initiate the scan, the tool will automatically search for lost file signatures. It efficiently maps out the drive’s structure, even if you deleted or wiped the partition.
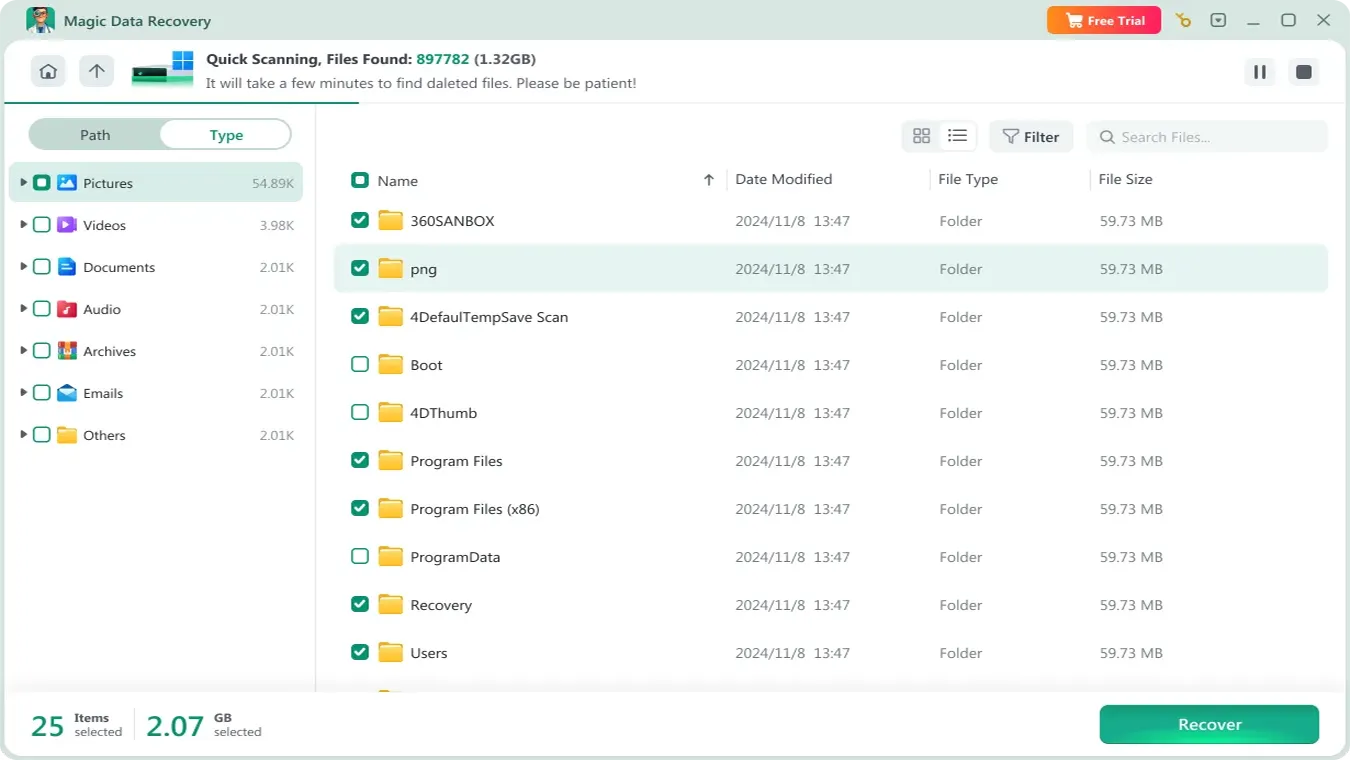
4. Preview for Accuracy: Before finalizing the process, use the preview window to inspect your files. This feature is vital because it confirms that your files are fully intact before you commit to the final recovery.

5. Secure Your Files: Finally, choose the files you wish to keep and save them to an another drive. Never save recovered data back to the same drive in case the lost files get overwritten.
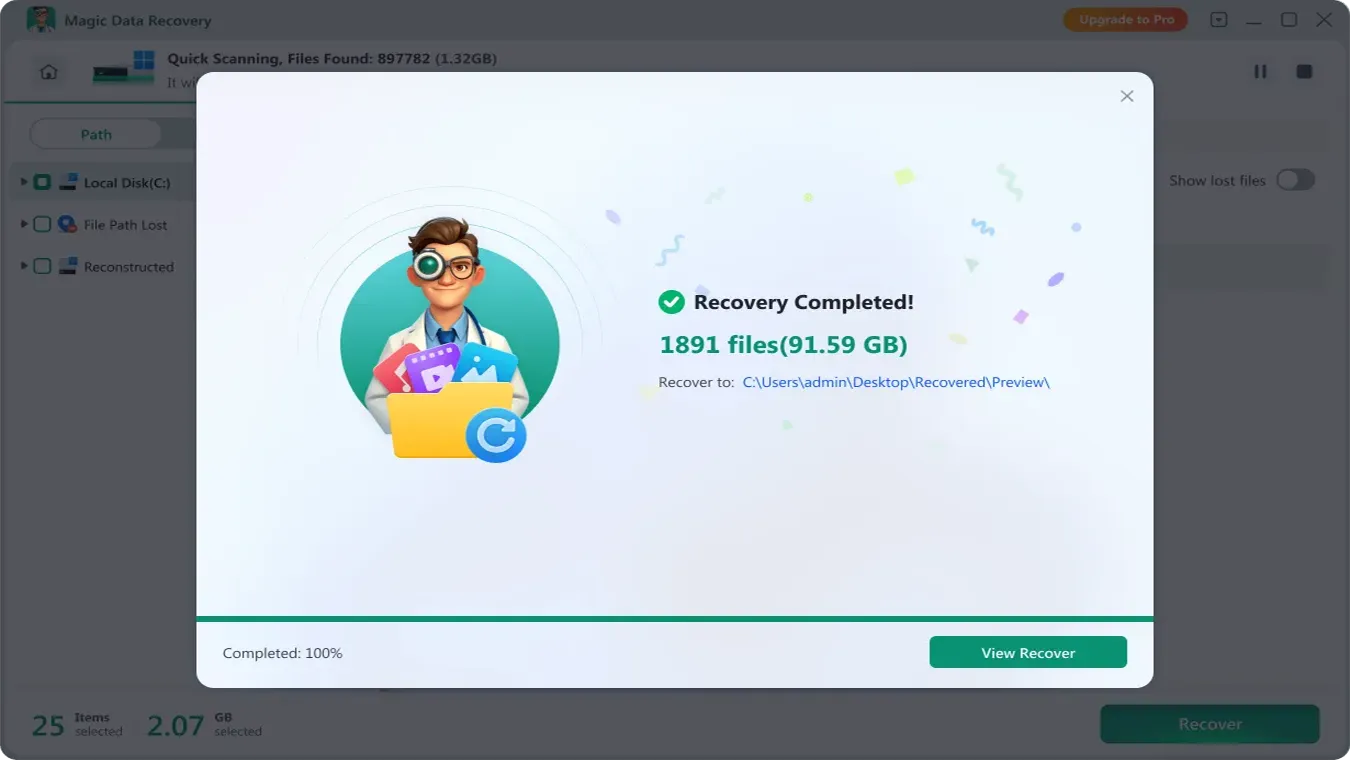
If you are worried about losing data while trying to delete recovery partition space, having Magic Data Recovery ready is the most reliable way to ensure a stress-free experience.
Conclusion
Learning how to delete recovery partition is a great way to reclaim several gigabytes of space, especially on smaller SSDs. By using the Diskpart utility, you can bypass system restrictions and take full control of your hardware.
However, manual partition manipulation always carries a degree of danger. Professional tools and careful planning are the keys to a successful disk cleanup. We highly recommend having a recovery plan in place before you start. If you ever find yourself in a situation where a partition has disappeared or data has been wiped, Magic Data Recovery stands out as the most dependable solution to recover the data. It bridges the gap between technical disk management and user-friendly data protection.
Supports Windows 7/8/10/11 and Windows Server
FAQ: How to Delete Recovery Partitions
Can I delete a recovery partition?
What is recovery partition for?
Is it safe to disable WinRE?
How do I delete the recovery folder in Windows 10?
How do I force delete a partition?
Why does Windows create a recovery partition?

Vasilii is a data recovery specialist with around 10 years of hands-on experience in the field. Throughout his career, he has successfully solved thousands of complex cases involving deleted files, formatted drives, lost partitions, and RAW file systems. His expertise covers both manual recovery methods using professional tools like hex editors and advanced automated solutions with recovery software. Vasilii's mission is to make reliable data recovery knowledge accessible to both IT professionals and everyday users, helping them safeguard their valuable digital assets.