
Erase Recovery Partition Safely: Complete Guide

Is your hard drive running out of space, or are you seeing a mysterious “healthy recovery partition” taking up several gigabytes of your SSD? Many users find themselves stuck when they try to erase recovery partition data through traditional methods, only to find the options greyed out.
Managing disk space is a balancing act. While Windows creates these partitions to help you during system failures, modern users often prefer to back up their data externally and use that extra space for apps or games. However, modifying your disk’s structure is risky. A single wrong command can lead to data loss. This guide will show you how to erase a recovery partition in Windows safely, while ensuring you can recover files from lost partitions with professional tools like Magic Data Recovery.
Supports Windows 7/8/10/11 and Windows Server
Table of Contents
What Does Recovery Partition Mean?
Before you decide to erase recovery partition, you must understand what it is. A recovery partition is a dedicated section of your hard drive that stores system image files. These files allow you to restore Windows to its factory settings if the operating system becomes corrupted.
Essentially, it acts as an emergency toolkit. Manufacturers like Dell, HP, and Lenovo often include their own specialized versions. While useful, these partitions can consume anywhere from 500MB to 20GB of valuable space. Because Windows marks these sections as “Protected,” you cannot simply right-click and delete them in the standard Disk Management view.
Is Recovery Partition Necessary?
The short answer is: it depends on your backup strategy. A recovery partition is necessary if you want the ability to reset your PC without using an external USB drive. However, it is not required for the daily operation of Windows.
Many power users choose to erase recovery partition data because they maintain their own system backups on external hard drives or cloud storage. If you have a Windows installation media (USB or DVD) and a full backup of your personal files, the built-in recovery partition becomes redundant. Reclaiming this space is a common practice when upgrading to smaller, faster SSDs where every gigabyte counts.
Method 1: Using Windows Disk Management (Standard)
The easiest way to erase a recovery partition in Windows is through the built-in Disk Management tool. However, this method only works for basic, non-protected partitions, which means you may need to boot from another drive to delete the recovery partition.
1. Right-click the Start button and select Disk Management.
2. Locate the disk containing the partition you want to remove.
3. Right-click the Recovery Partition.
4. If the option is available, select Delete Volume.
5. Confirm the choice and the space will become “Unallocated.”
Note: In many cases, the “Delete” option is greyed out or even doesn’t show up. If you encounter this, you must use the command-line method described below.
Method 2: Erase a Recovery Partition in Windows via DiskPart
When the standard interface fails, the DiskPart utility is the most effective way to erase recovery partition data. This tool allows you to override system protections. Please follow these steps carefully.
Step 1: Open Command Prompt
Type cmd in the Windows search bar, right-click the result, and select Run as Administrator.
Step 2: Launch DiskPart
Type the following command and press Enter:diskpart
Step 3: Identify the Disk
To see all connected drives, type:list diskLook for the disk number that contains your recovery partition (usually Disk 0 or Disk 1).

Step 4: Select the Disk
Type the following (replace n with your disk number):select disk n
Step 5: List and Select the Partition
Type:list partitionIdentify the partition labeled “Recovery.” Then type:select partition n (replace n with the partition number).
Step 6: The Override Command
To erase a recovery partition in Windows that is protected, you must use the override flag. Type:delete partition override
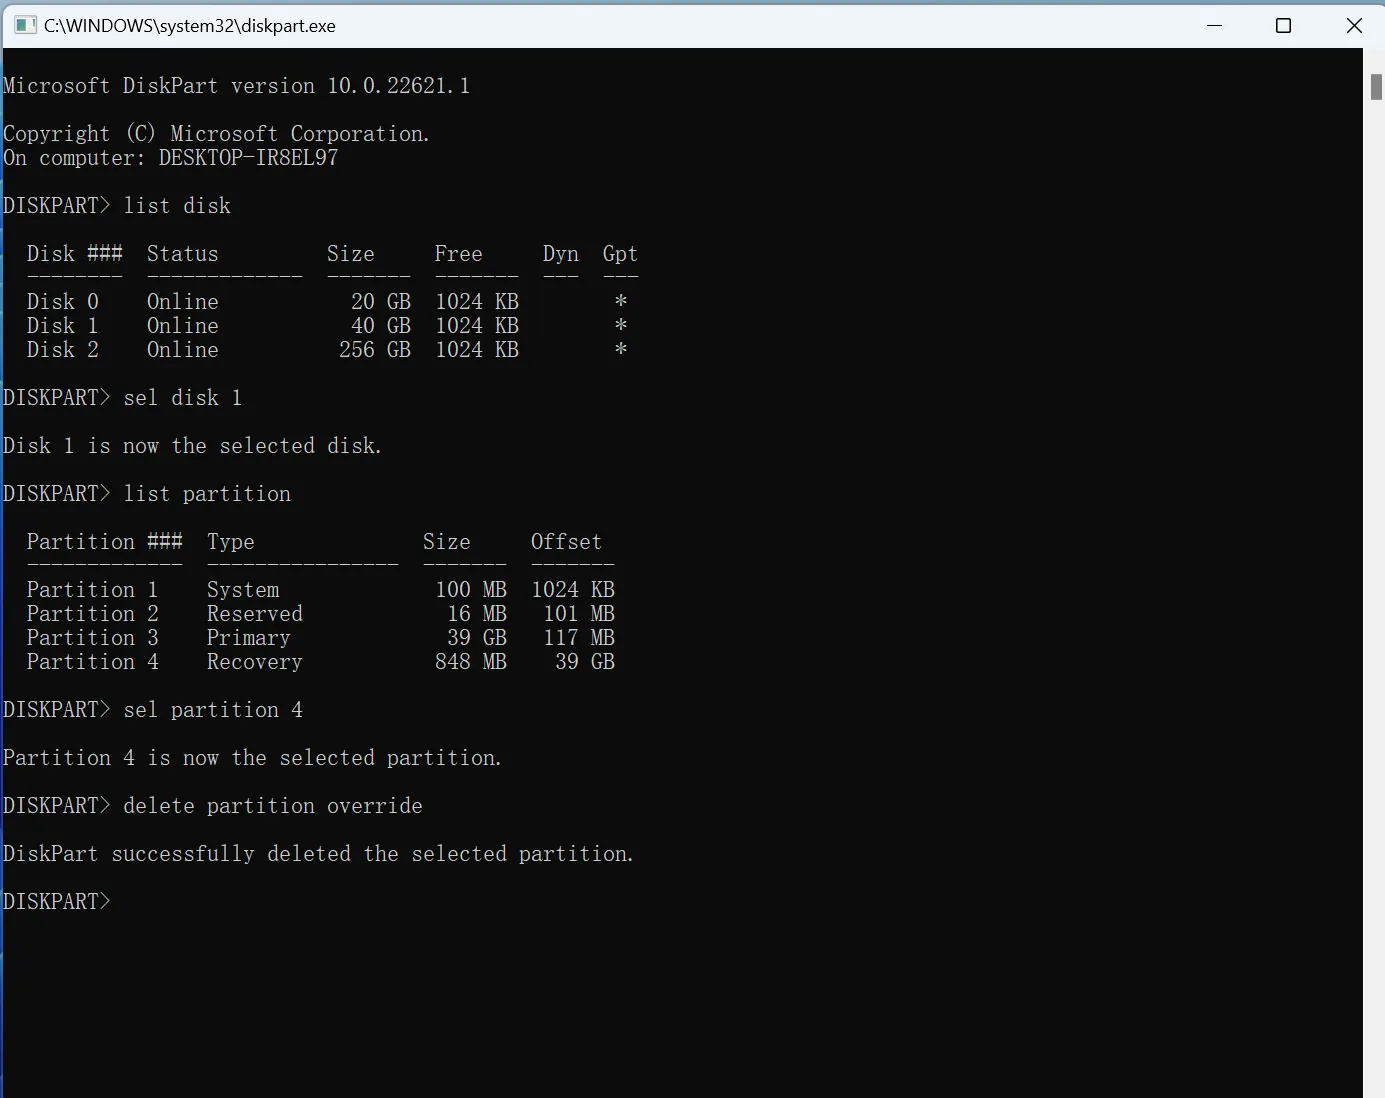
Once the command finishes, Windows will successfully erase recovery partition data, leaving you with unallocated space that you can merge into your main C: drive.

Don’t Panic If You Delete a Wrong Partition
If you accidentally delete the wrong volume or if the partition table becomes corrupted during the process, you could lose years of photos and documents.
Even if you follow instructions perfectly, hardware glitches can happen. This is where Magic Data Recovery becomes an essential part of your toolkit.
How to Recover Data if Partition Removal Goes Wrong
If you made a mistake while trying to erase recovery partition data, or if your drive became inaccessible, follow these steps to retrieve your files using Magic Data Recovery:
1. Installation for Safety: Download and install the software on a drive that is different from the one you are modifying. This prevents overwriting the very data you are trying to save.
Supports Windows 7/8/10/11 and Windows Server
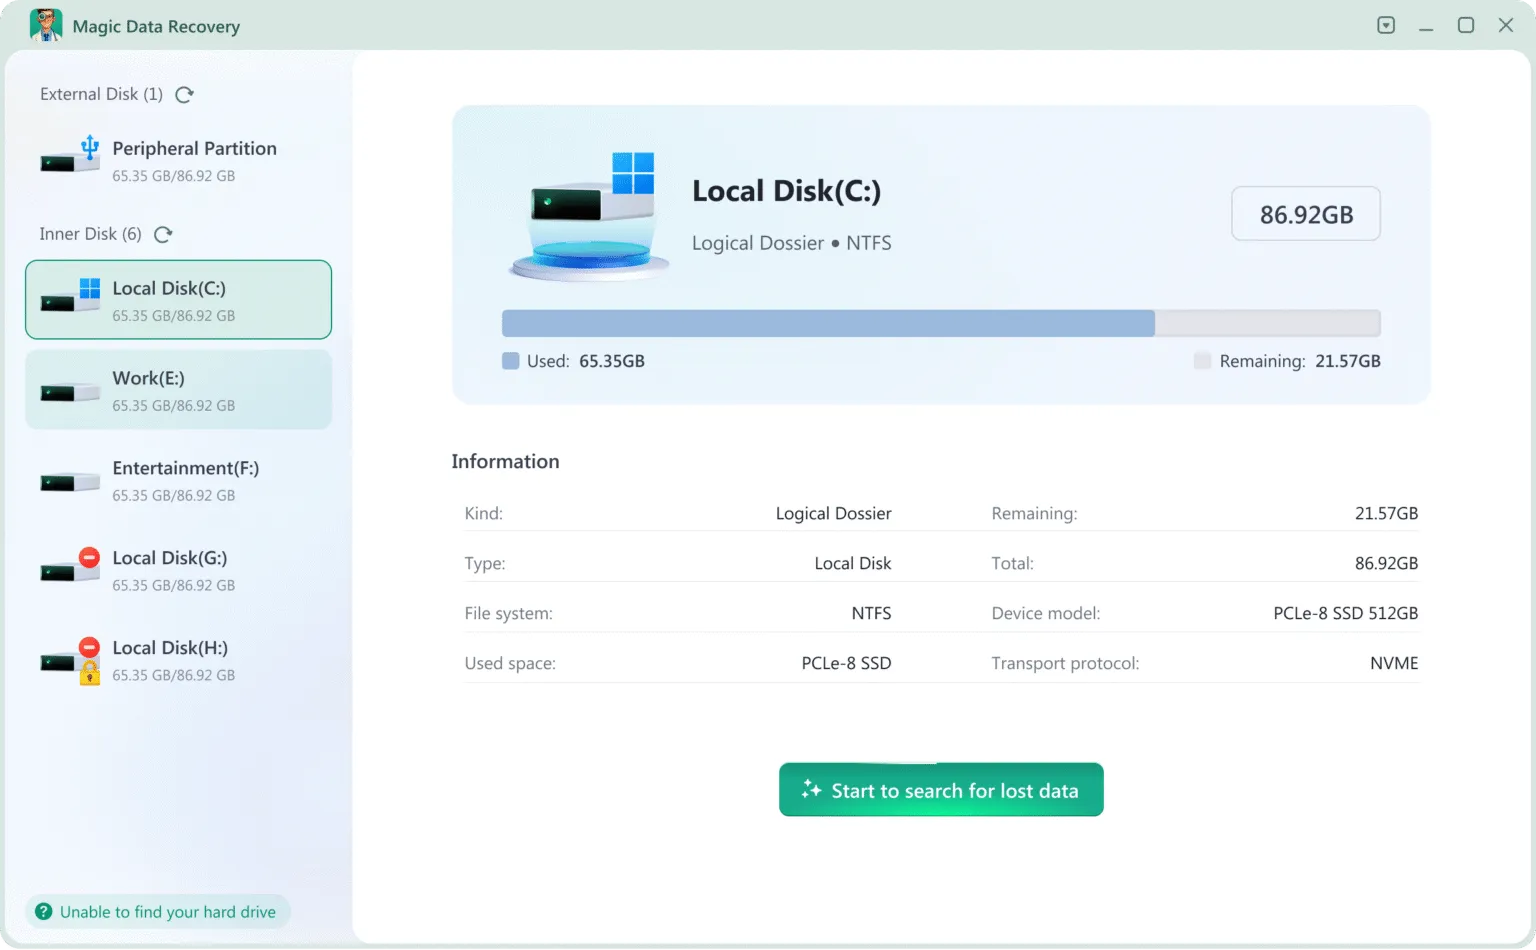
2. Target the Drive: Launch the program and select the specific hard drive where the partition was modified or deleted. Start the scanning process to look for remnants of your files.
3. Advanced Scanning: The software will execute an Advanced Scan automatically. You can watch the list grow in real-time as it identifies recoverable documents, photos, and system files.
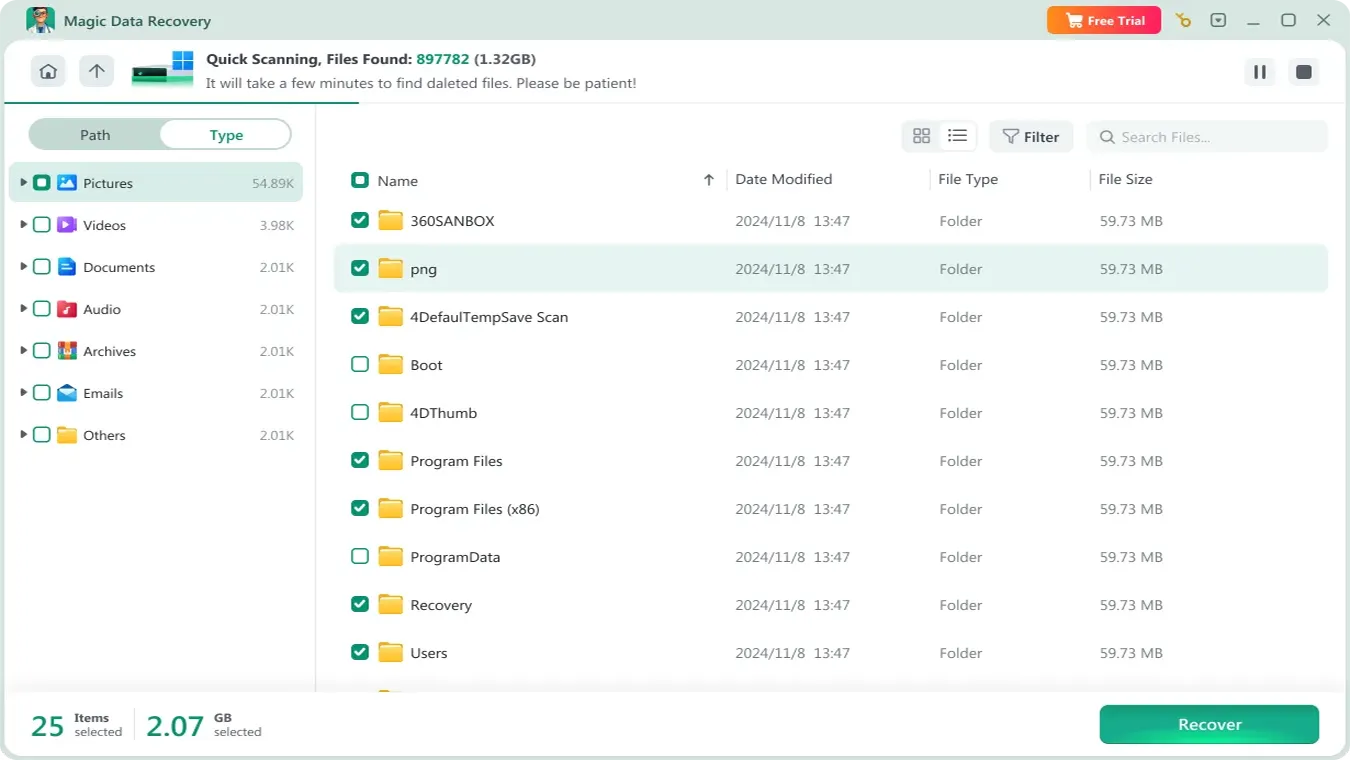
4. Verify Content: Use the built-in preview feature to look at the files before you commit to the recovery. This ensures that the data is intact and functional.

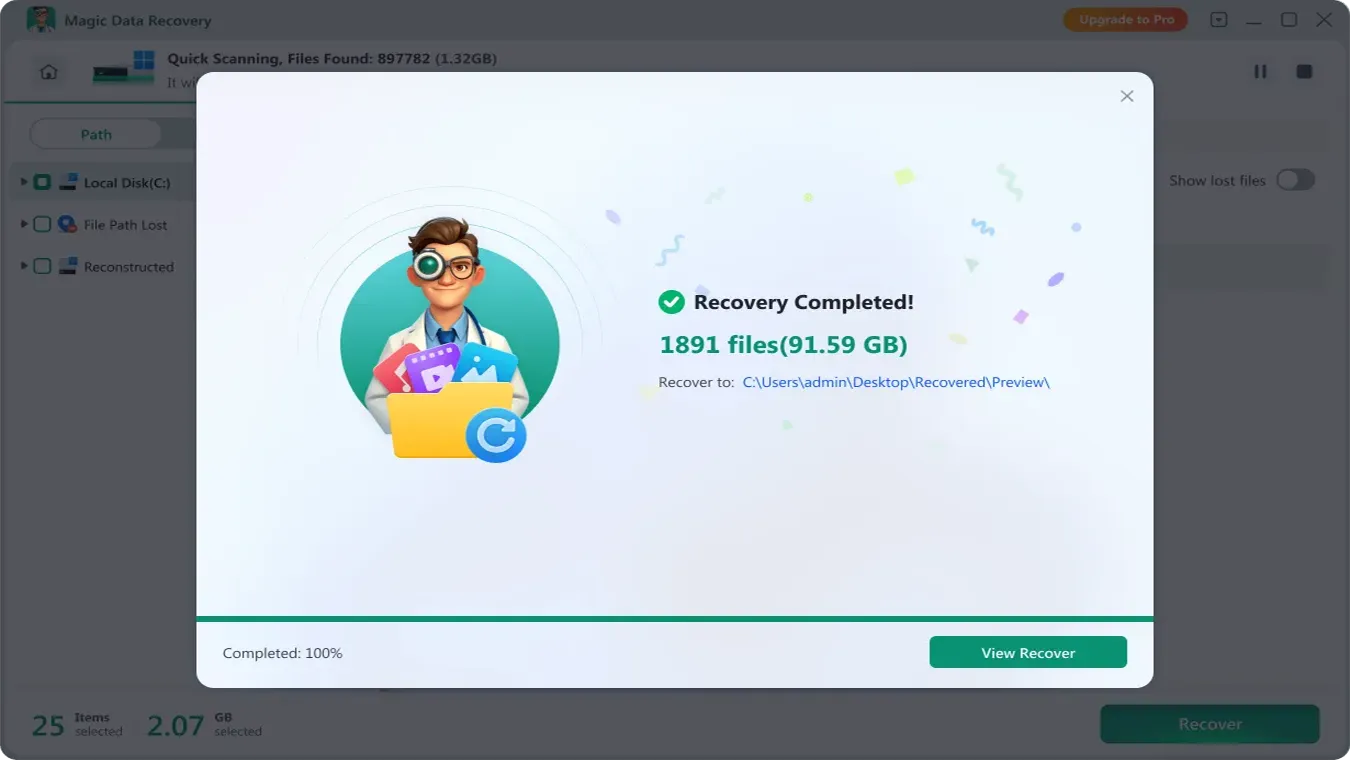
5. Secure Restore: Select your essential files and save them to a completely different storage device. Avoid restoring them to the same drive until you have successfully recreated your partitions.
Conclusion
Learning how to erase recovery partition data is a great way to optimize your storage, especially on modern laptops with limited SSD capacity. By using the DiskPart method, you can successfully erase a recovery partition in Windows even when the system tries to prevent it.
However, disk modification always carries a risk of human error. If you find that you’ve deleted the wrong partition or lost access to important files during the process, don’t panic. Professional tools like Magic Data Recovery are designed for data recovery from missing partitions. It provides a reliable way to undo the damage of accidental deletions and ensures your data remains intact throughout your disk optimization journey.
Supports Windows 7/8/10/11 and Windows Server
FAQ
What happens if I delete a recovery partition?
How do I delete the recovery partition on Windows?
Is it safe to disable WinRE?
Can I delete a recovery folder?
Is recovery partition necessary?

Vasilii is a data recovery specialist with around 10 years of hands-on experience in the field. Throughout his career, he has successfully solved thousands of complex cases involving deleted files, formatted drives, lost partitions, and RAW file systems. His expertise covers both manual recovery methods using professional tools like hex editors and advanced automated solutions with recovery software. Vasilii's mission is to make reliable data recovery knowledge accessible to both IT professionals and everyday users, helping them safeguard their valuable digital assets.