
Ultimate Guide to Windows 7 Data Recovery: How to Restore Lost Files
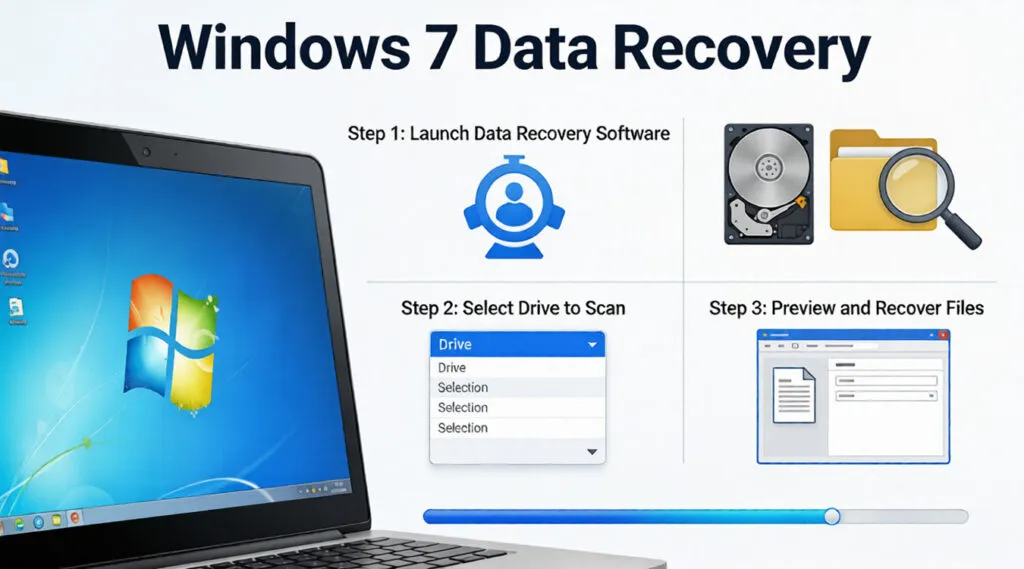
Even though Microsoft ended its official support for the system years ago, millions of professionals and industrial legacy systems still rely on Windows 7 for its stability. However, hardware aging and the lack of security updates make data loss a frequent nightmare for loyal users. Whether you accidentally emptied the Recycle Bin or encountered a sudden system crash, understanding the mechanics of Windows 7 data recovery is essential to protecting your valuable digital assets.
In this comprehensive guide, we will explore both native system features and professional Windows 7 data recovery software solutions. By following these industry best practices, you can maximize your chances of retrieving lost files from your hard drive. Consequently, even non-technical users can achieve professional results at home.
Supports Windows 7/8/10/11 and Windows Server
Wondering if your files can be recovered? Find out in seconds with our quick check below.
Data Recovery Assessment
Answer 3 quick questions to estimate your recovery chances
Table of Contents
The Reality of Data Loss on Windows 7
When you delete a file on Windows 7, the operating system does not immediately erase the binary data from the disk sectors. Instead, the file system marks the space occupied by that file as “available” for new information. This creates a critical window of opportunity to recover the data on Windows 7. If you avoid writing new data to that specific drive, the original files remain intact but invisible to the explorer.
Common scenarios that lead to data loss include:
- Accidental deletion of folders or critical system files.
- Formatting a partition without a proper external backup.
- File system corruption, which often changes the drive status to RAW.
- Malware attacks targeting unpatched vulnerabilities in older systems.
To ensure the best outcome, you must stop using the affected drive immediately. Continued use increases the risk of “overwriting,” which makes the original data unrecoverable even by the most advanced Windows 7 data recovery software.
Method 1: Recovering Files via Windows 7 Built-in Tools
Before you invest in third-party tools, Windows 7 offers several built-in mechanisms that might save your data for free. These methods rely on previous configurations and background services that many users unknowingly have active.
1. The Recycle Bin Recovery
This is the most basic step, but people often overlook it during a panic. If you simply pressed “Delete” rather than “Shift+Delete,” your files are likely sitting in the Recycle Bin. You should open the bin, locate your files, right-click, and select “Restore.”
2. Restoring from “Previous Versions”
Windows 7 features a powerful tool called “Shadow Copy.” If you had System Protection turned on, the system automatically saves snapshots of your files.
- First, navigate to the folder that used to contain the deleted file.
- Second, right-click the folder and select Restore previous versions.
- Finally, choose a version dated before the deletion and click “Restore.”
3. Using Windows Backup and Restore
If you followed the “best practice” of setting up an external backup, you can use the native utility. Go to Control Panel > System and Security > Backup and Restore. Click on “Restore my files” and follow the wizard instructions. However, many users find this method fails if the backup drive itself is corrupted.
Method 2: Professional Windows 7 Data Recovery Software
Native tools have significant limitations. For instance, they cannot help if you formatted the drive, if the file system is corrupted, or if you never set up a backup. In these critical situations, you need a specialized tool that can communicate directly with the disk’s Master File Table (MFT).
Introducing Magic Data Recovery
If you are looking for a reliable, high-performance solution, Magic Data Recovery stands out as a premier Windows 7 data recovery software. While many modern developers have dropped support for legacy environments, our engineers optimized Magic Data Recovery specifically for the NTFS and FAT file systems commonly used in the Windows 7 era.
Why Choose Magic Data Recovery?
- Advanced Scan Technology: Our algorithm goes beyond simple file pointers to reconstruct data from the raw sectors of your hard drive.
- Legacy Compatibility: While other developers focus only on data recovery on Windows 11, this software maintains perfect stability on Windows 7 (32-bit and 64-bit).
- Preview Functionality: You can view images, documents, and videos before committing to the recovery process. This ensures you only recover what you actually need.
- Risk-Free Operation: The software operates in “Read-Only” mode. Therefore, it will never write data to the source drive during the scanning process.
Typical Use Cases
Imagine you are a photographer with an old Windows 7 workstation. You accidentally format a partition containing years of raw images. Standard system tools will show nothing. However, by using Magic Data Recovery, the software bypasses the empty file table and identifies the unique file headers of your images. This allows for a near-perfect restoration of your creative work.
Step-by-Step: How to Use Magic Data Recovery on Windows 7
Using professional software doesn’t have to be complicated. Here is how you can perform a thorough Windows 7 data recovery in four simple steps:
1. Installation: Download and install Magic Data Recovery. Important: You must install it on a different drive than the one you are trying to recover from.
Supports Windows 7/8/10/11 and Windows Server
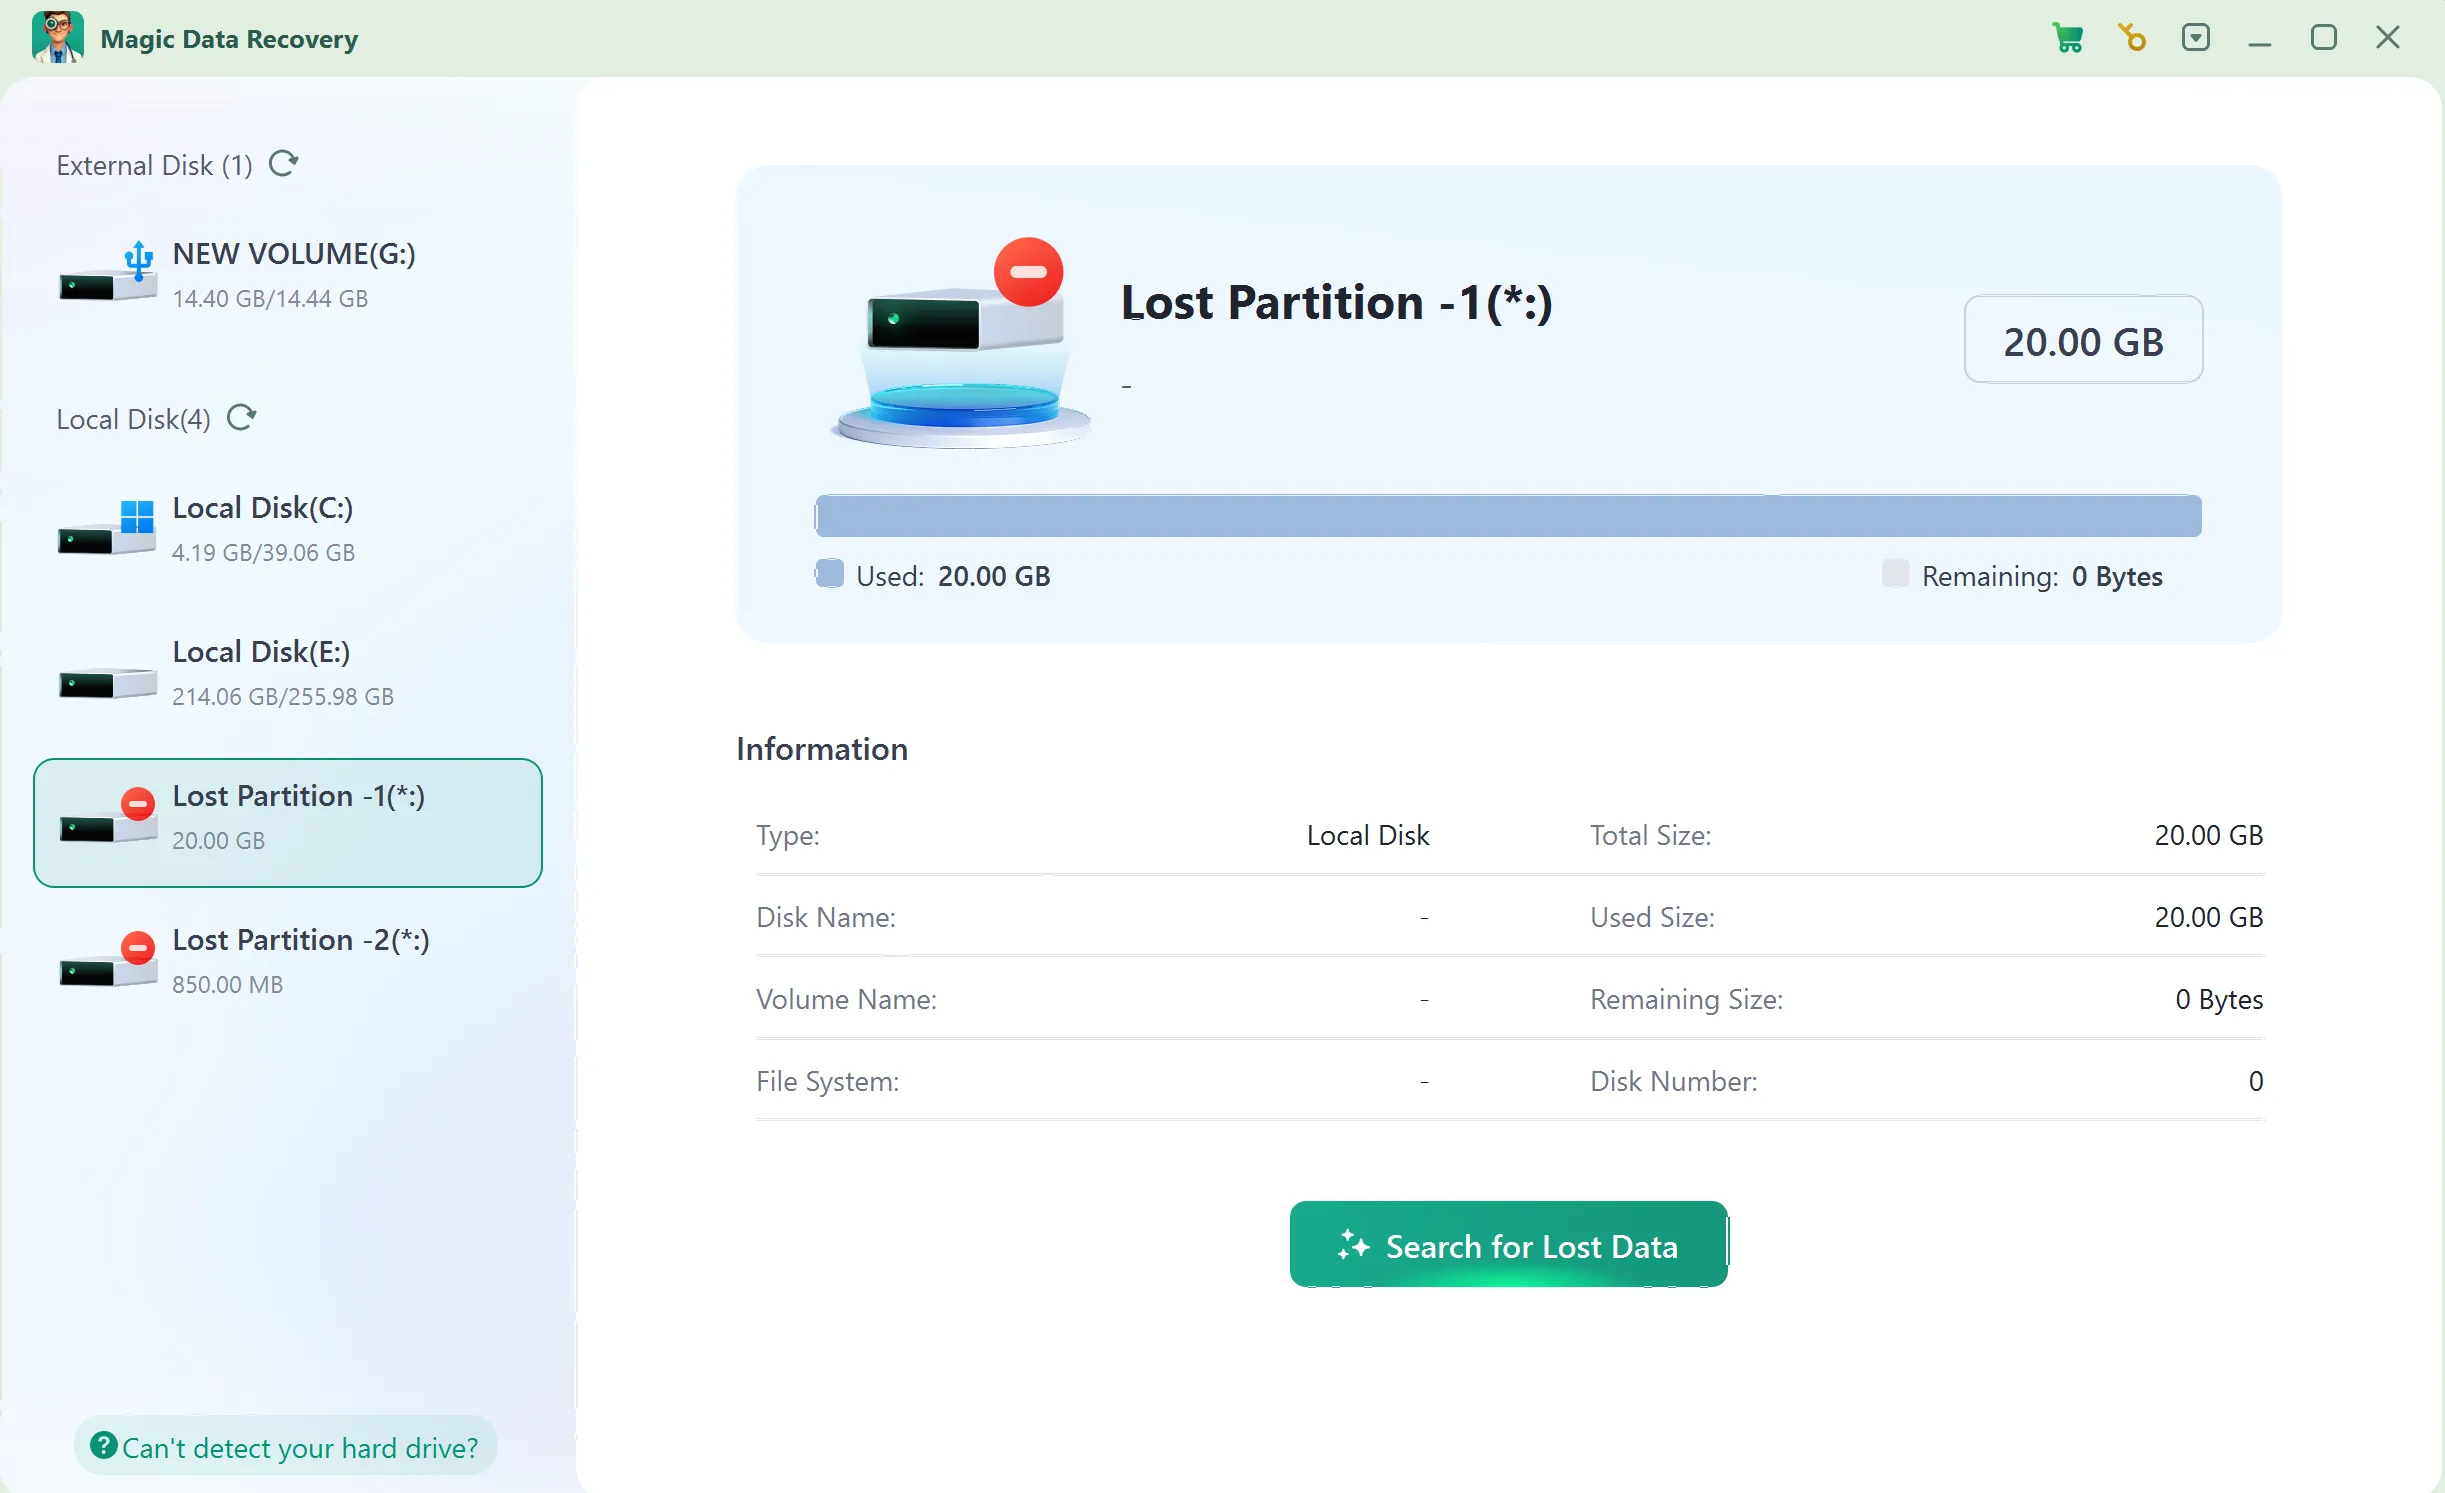
2. Select the Partition: Launch the program and select the disk partition or external USB drive where the data was lost, and start searching for lost files.
3. Scan for Files: It runs Quick Scan and Advanced Scan automatically. When the scan completes, you will see all the files on the drive.
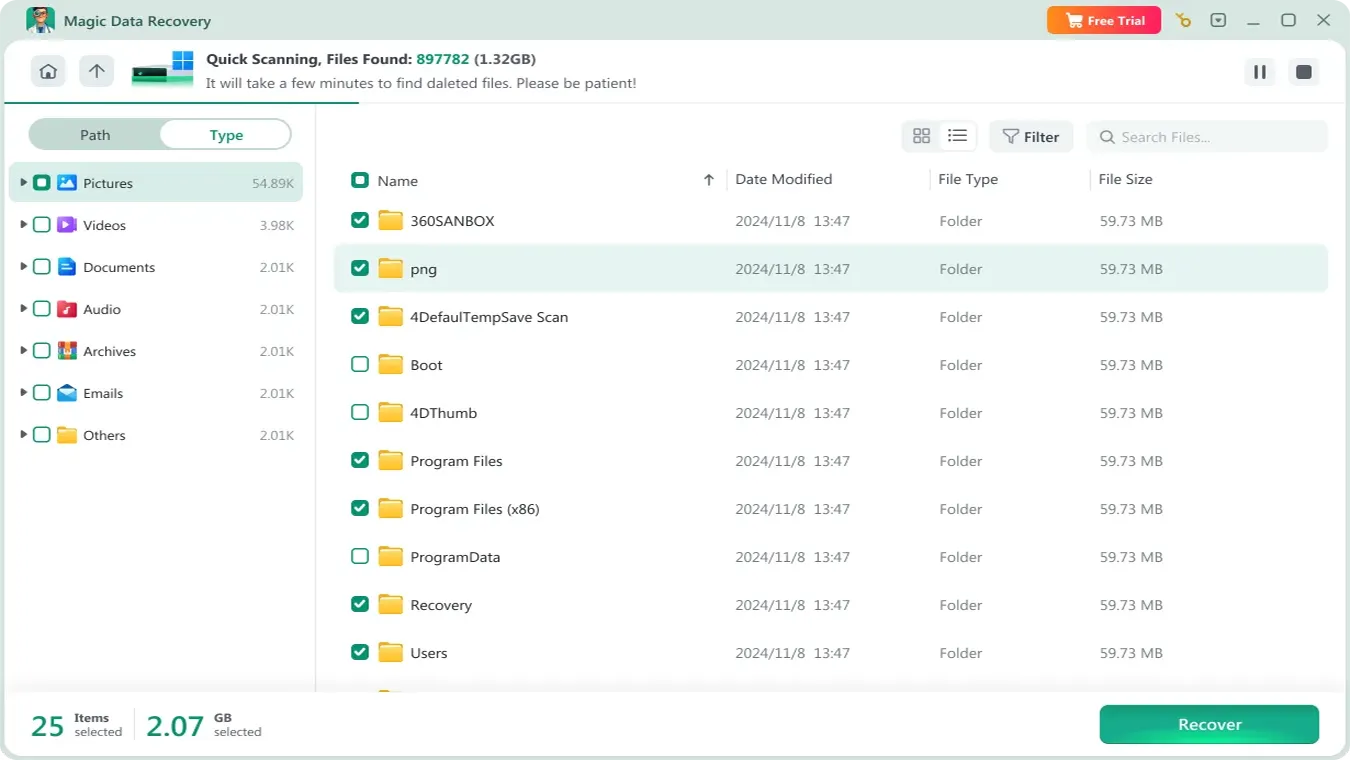
4. Preview Files: Browse the found files using the preview window. This feature helps you confirm the file contents before recovery.

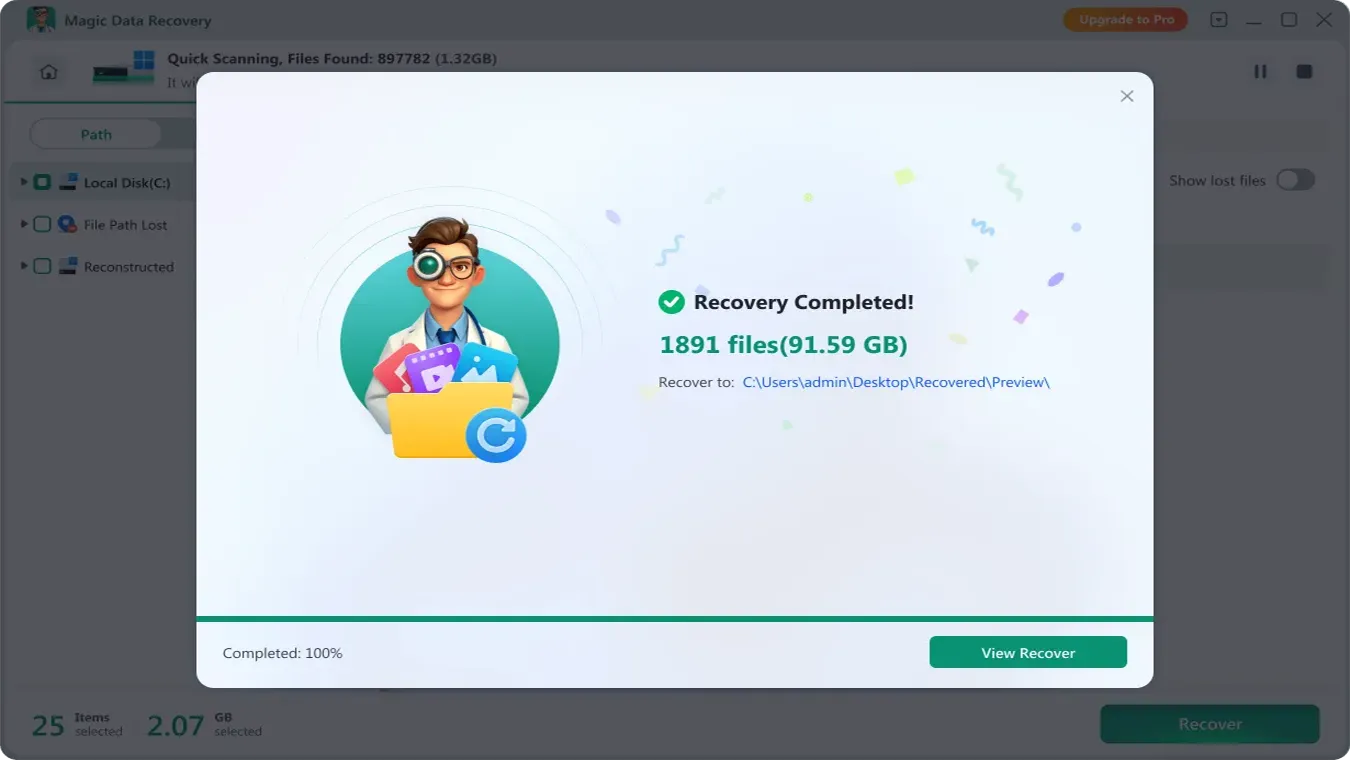
5. Recover: After you select the files you need, click the Recover button and save the files to another drive.
Note: Do Not save the files back to the original drive as it risks overwritng the lost data.
Why Magic Data Recovery is Superior to Other Options
When comparing Windows 7 data recovery software, many users find that mainstream competitors have become bloated and slow. Magic Data Recovery maintains a lightweight footprint, which is crucial for older hardware that may have limited RAM. Furthermore, its algorithm is specifically tuned to handle the disk fragmentation patterns typical of older mechanical hard drives (HDDs).
In contrast, many newer competitors prioritize SSD optimization and often fail to read older magnetic storage correctly. If you are looking for an efficient and user-friendly solution, we highly recommend giving Magic Data Recovery a try. It bridges the gap between professional-grade forensics and home-user simplicity. Moreover, it also remains a high success rate for Windows 7 data recovery in the industry.
Conclusion
Data loss is a stressful experience, especially on a legacy platform. While built-in tools like “Previous Versions” provide a quick fix for simple errors, they often fall short in the face of file system corruption or accidental formatting.
For a truly reliable result, investing in professional Windows 7 data recovery software is the smartest choice for HDD data recovery. Magic Data Recovery offers the perfect balance of advanced-scanning power and ease of use. It ensures that your memories and professional work aren’t lost to the passage of time or system instability. We believe that everyone deserves a second chance at their data.
If you are currently facing a data loss emergency, do not wait. The longer a drive stays active, the lower the recovery success rate becomes. If you need more help, try Magic Data Recovery today and see what you can find.
Supports Windows 7/8/10/11 and Windows Server
FAQs About Windows 7 Data Recovery
How to recover data from Windows 7?
Does Windows 7 have WinRE?
How to get files off a hard drive that won't turn on?
How do I recover permanently deleted files from Windows 7?
How to fix corrupted Windows 7?
How do I get into Windows 7 recovery?

Vasilii is a data recovery specialist with around 10 years of hands-on experience in the field. Throughout his career, he has successfully solved thousands of complex cases involving deleted files, formatted drives, lost partitions, and RAW file systems. His expertise covers both manual recovery methods using professional tools like hex editors and advanced automated solutions with recovery software. Vasilii's mission is to make reliable data recovery knowledge accessible to both IT professionals and everyday users, helping them safeguard their valuable digital assets.